2025 FRC Season Robot
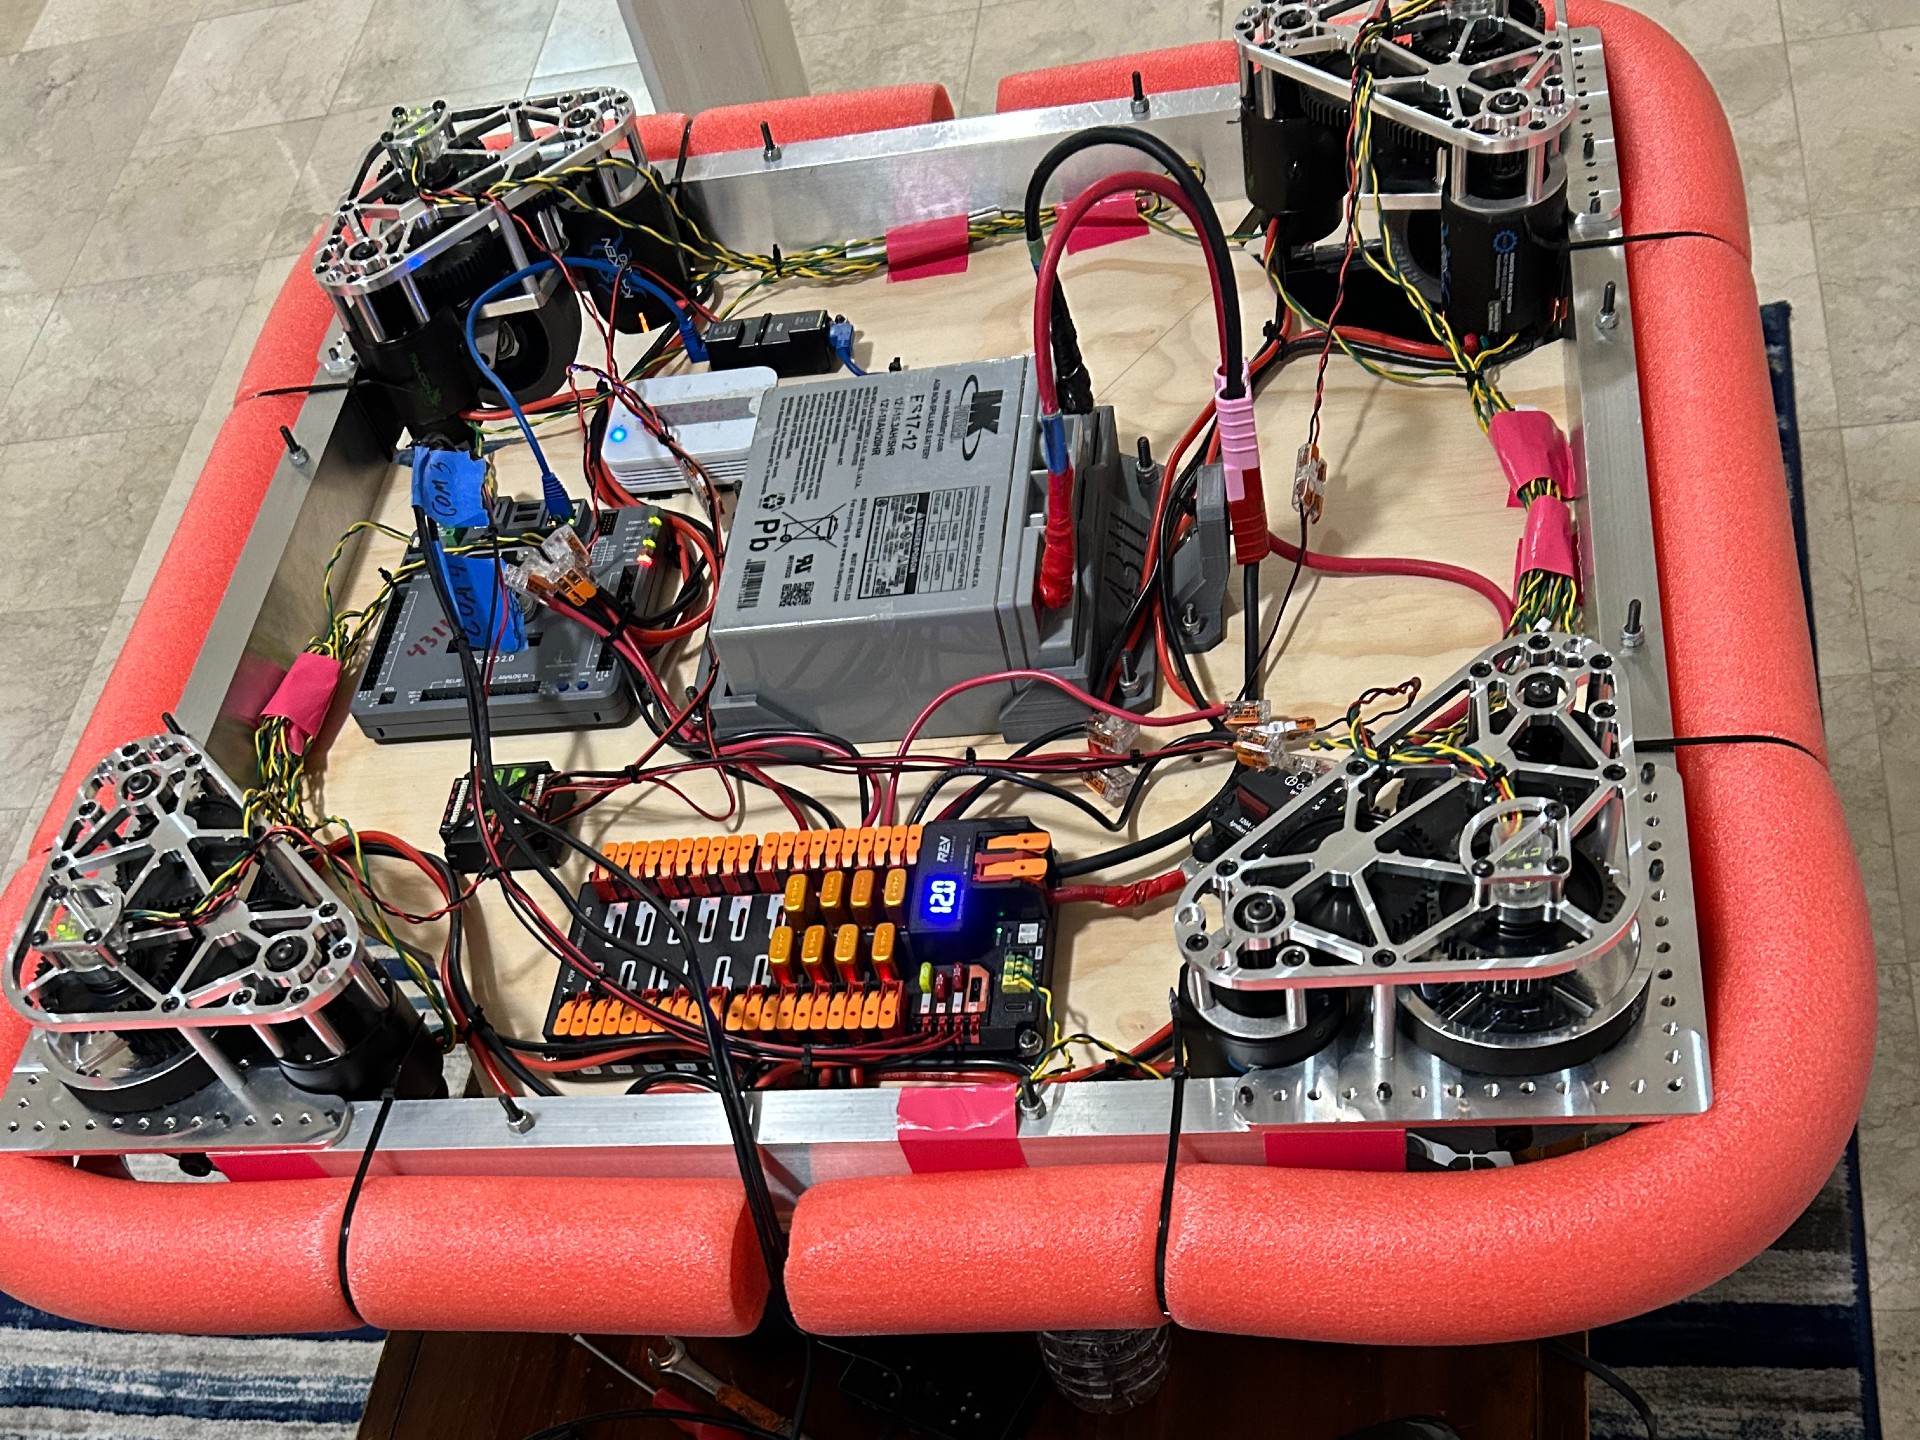
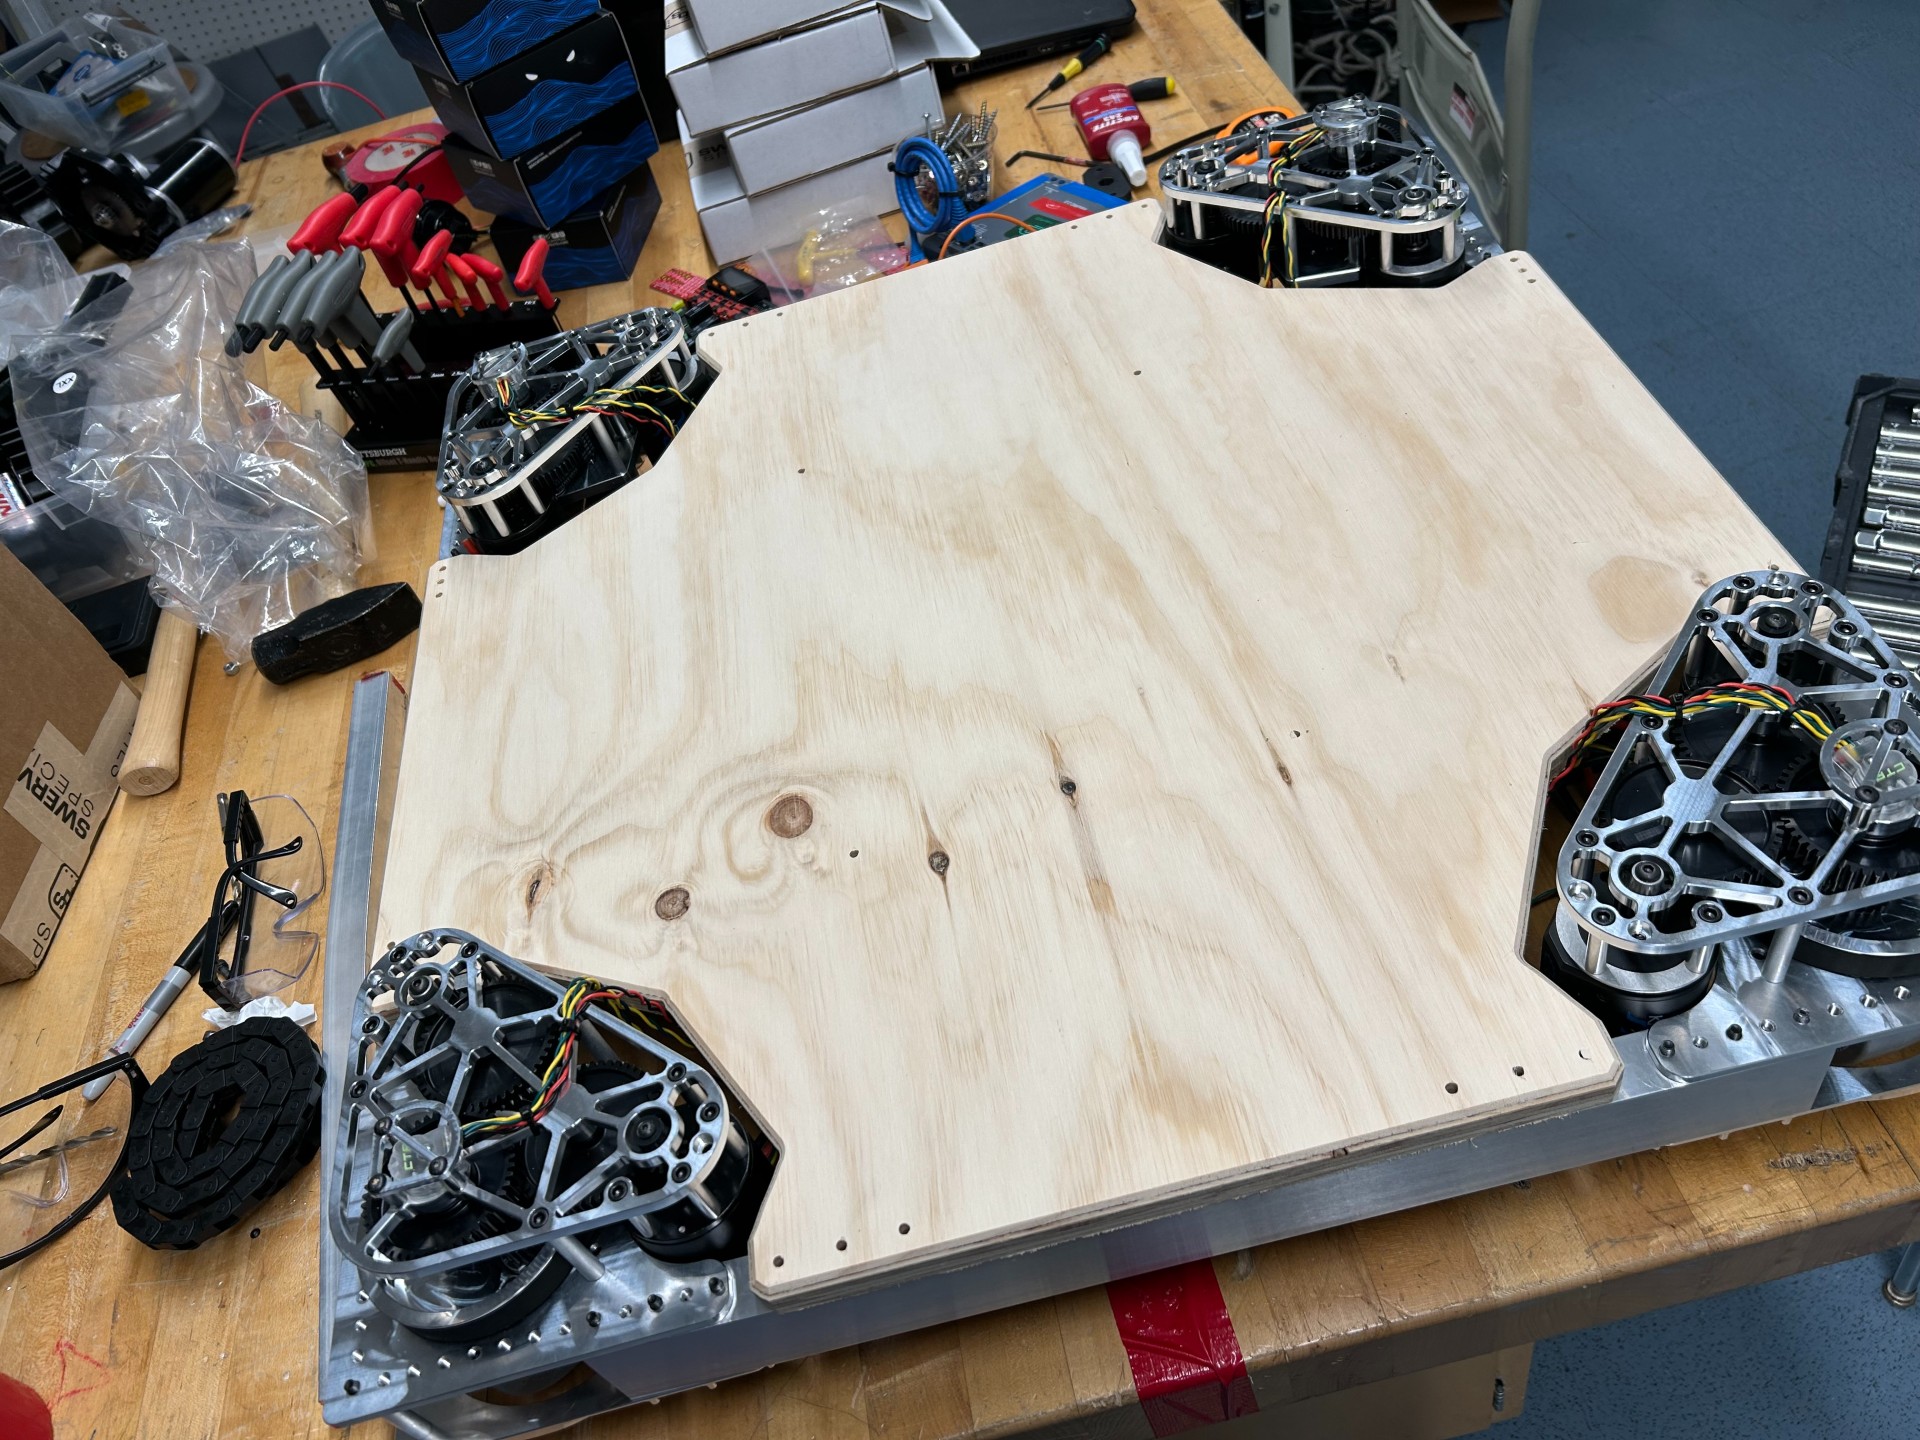
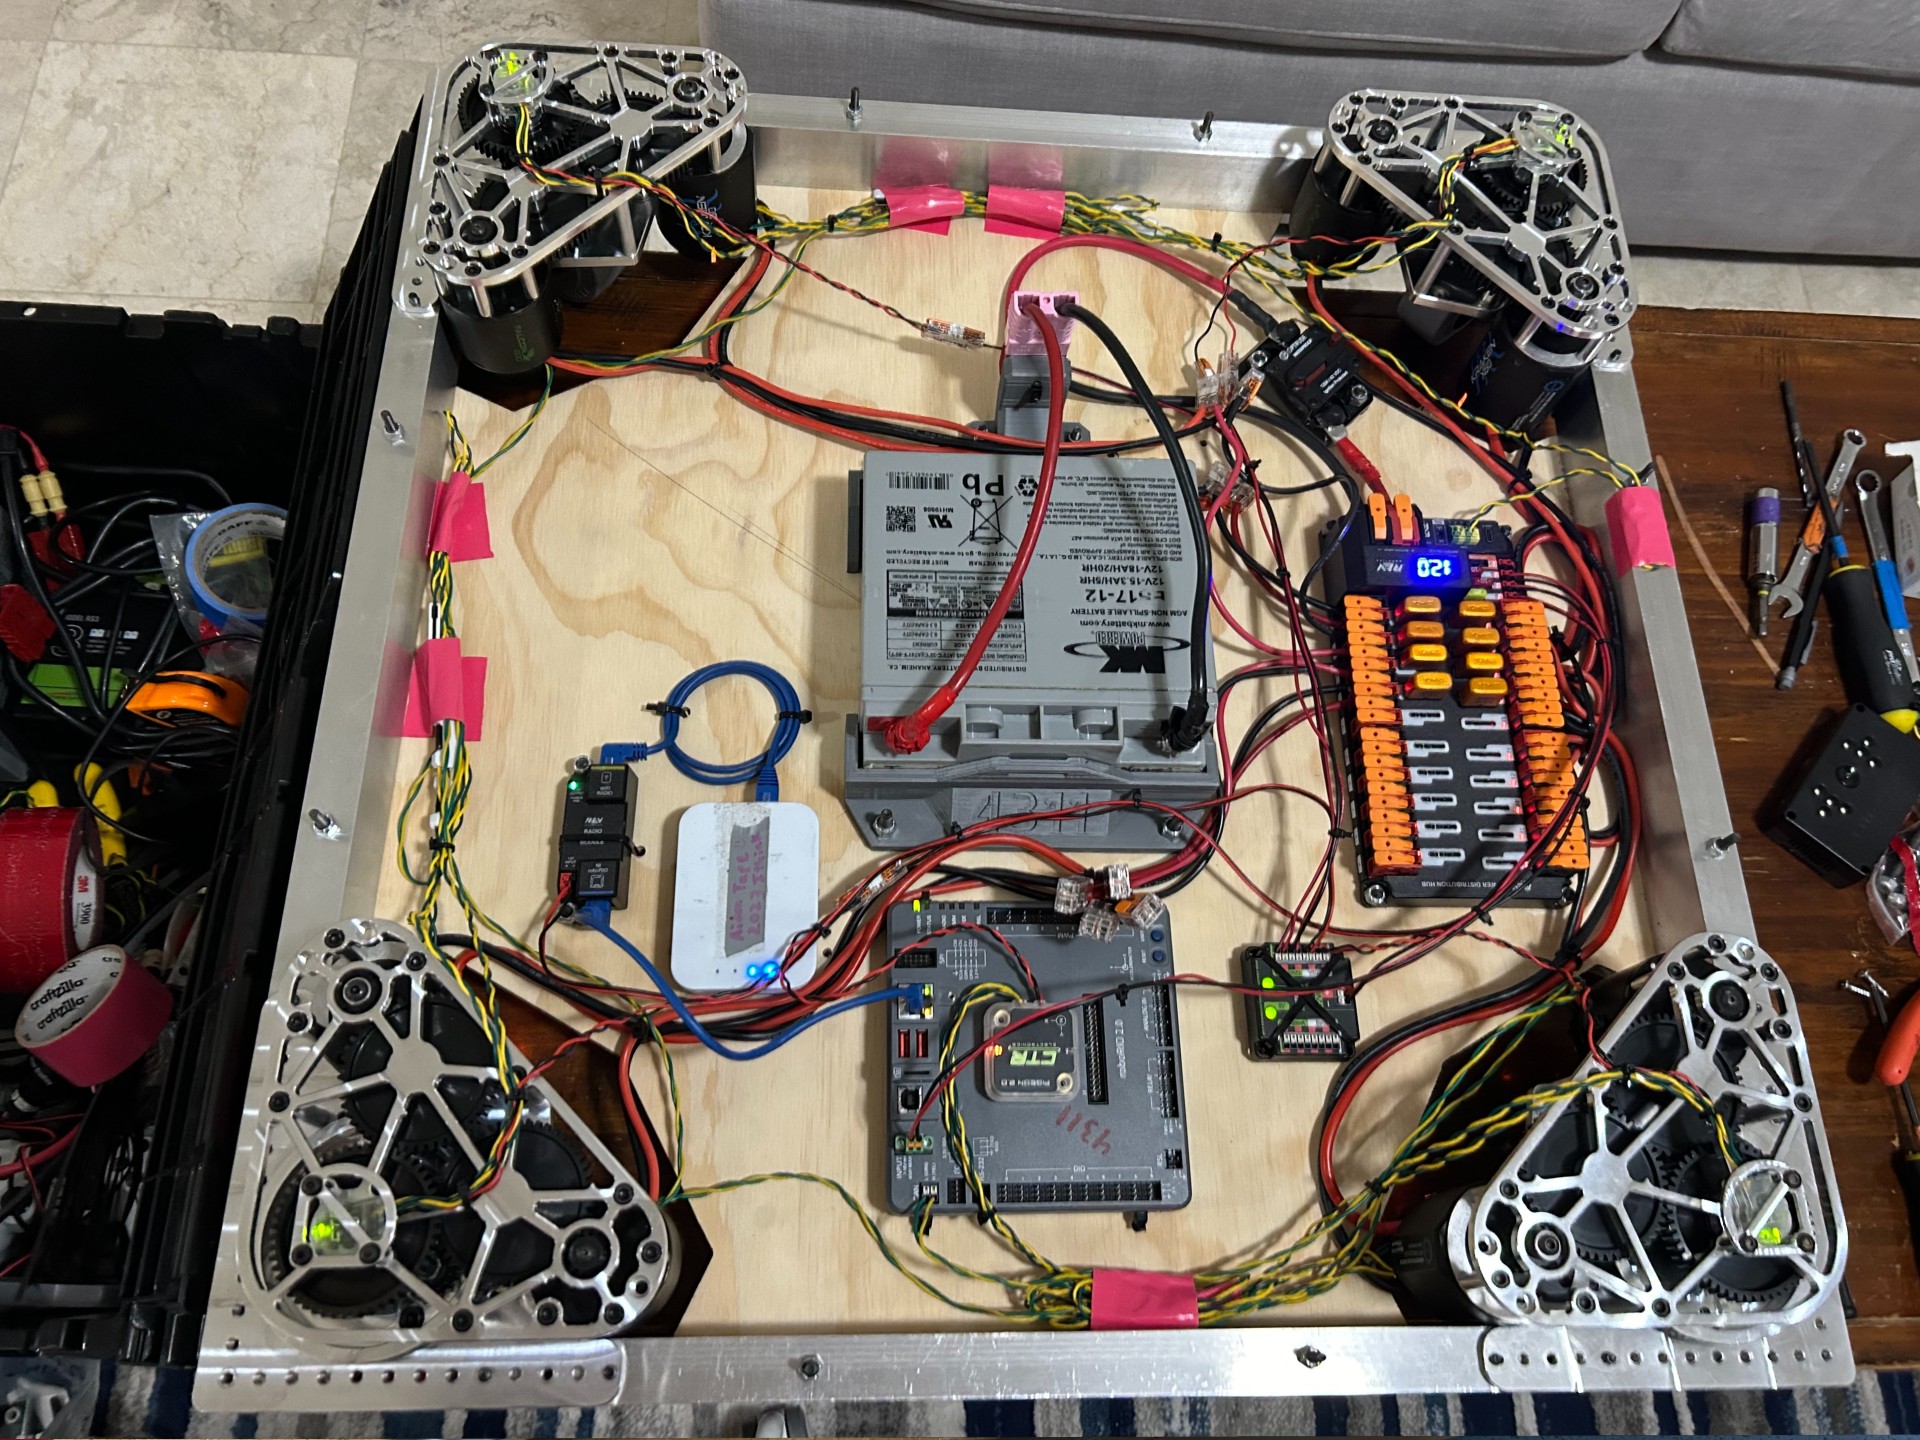
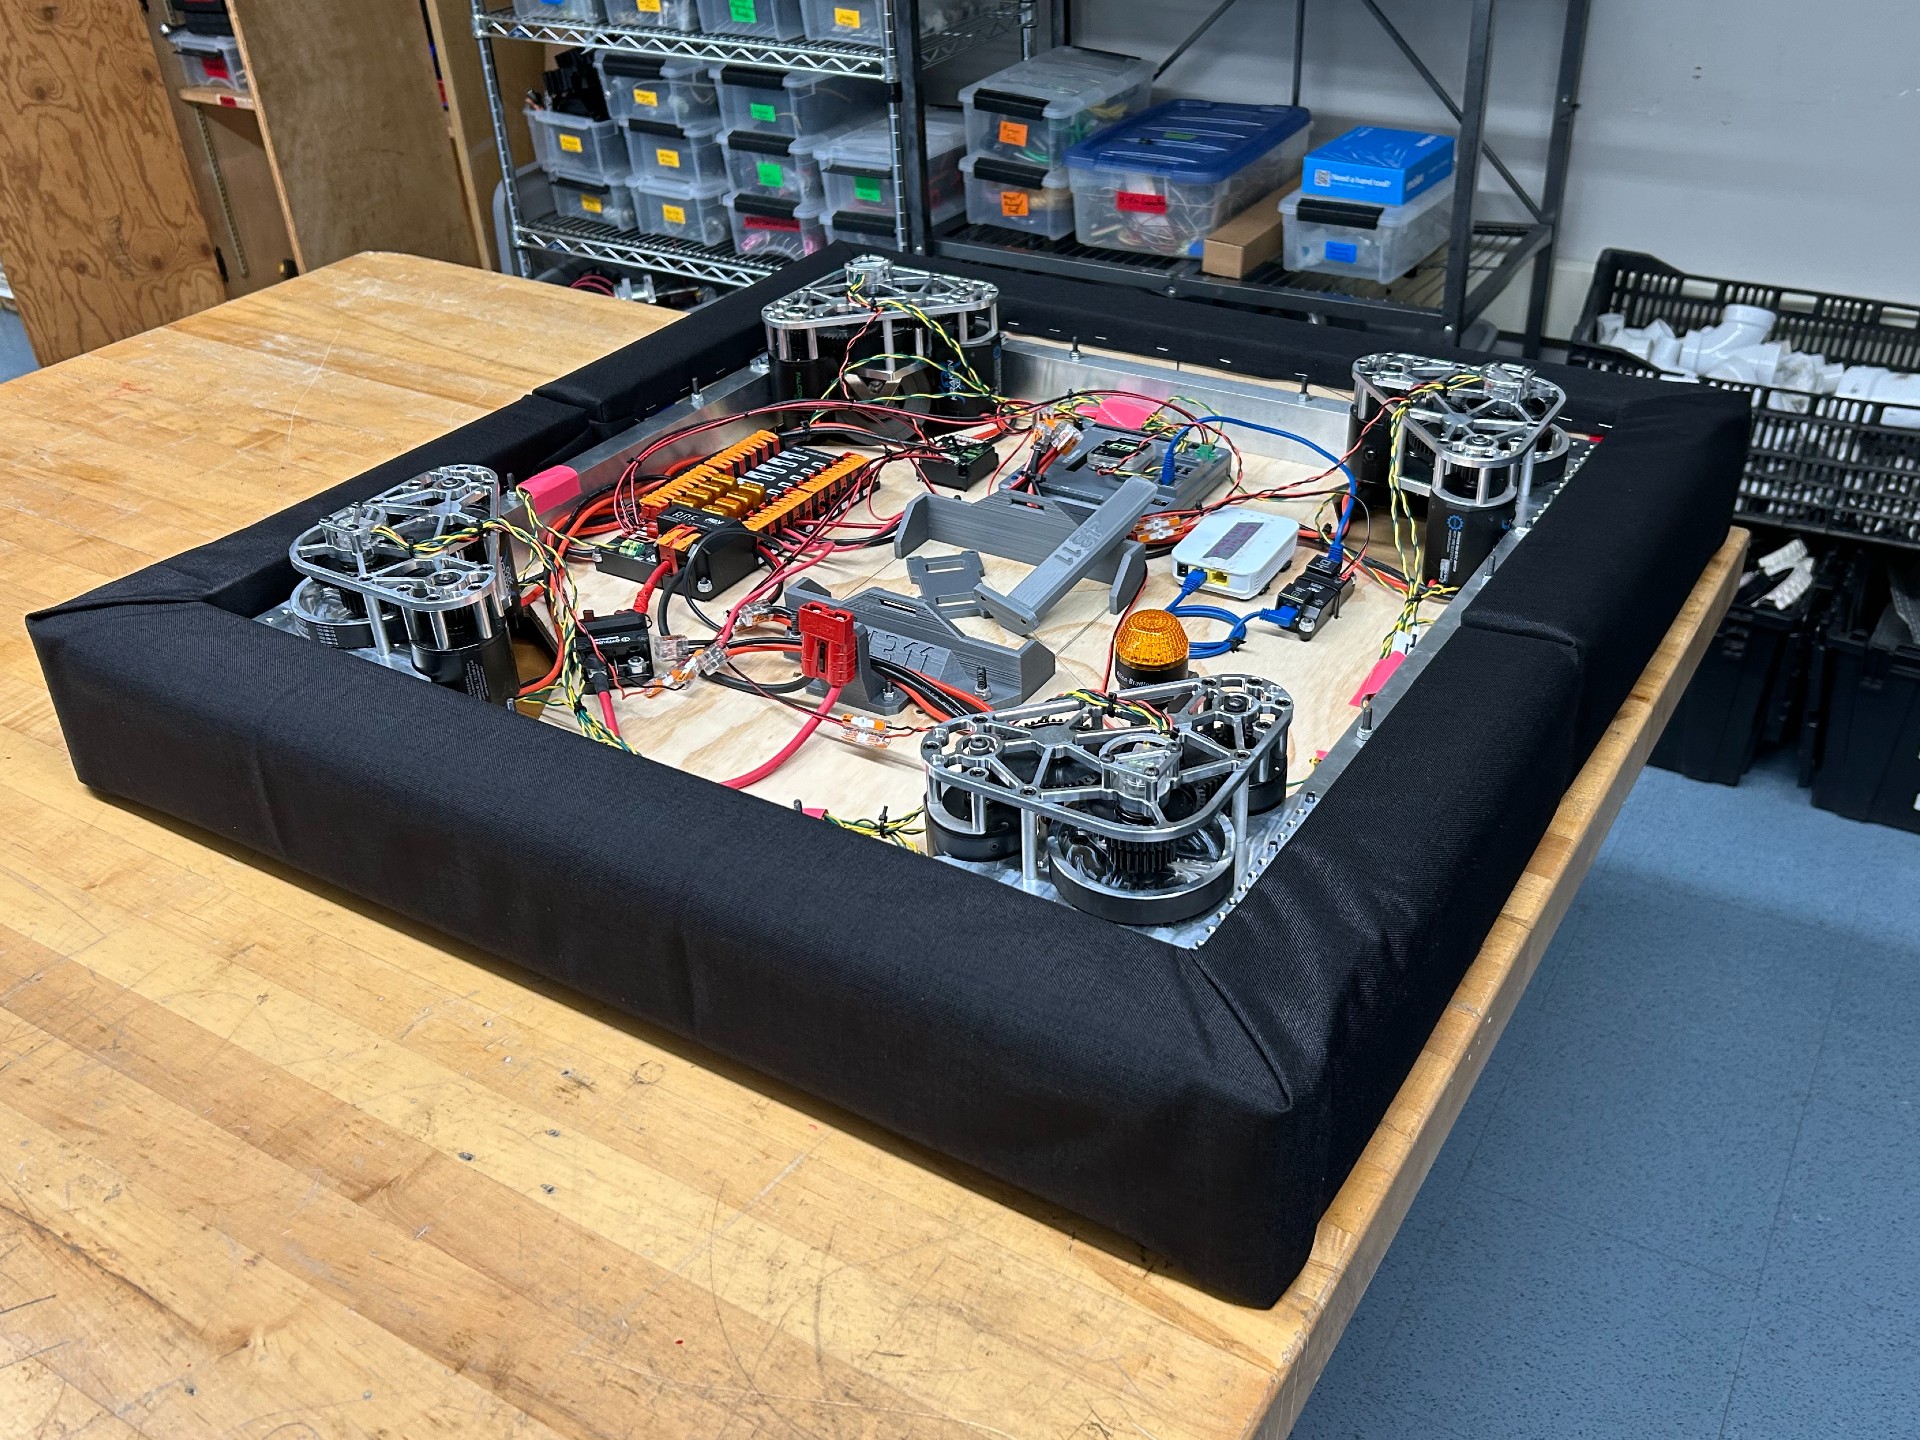
The summer going into this season I was injured from sports, so I spent a lot of that time working on implementing the new swerve-drive modules we purchased at the end of the previous school year. I used free periods and after-school time at the end of the year to build the drive base from scratch, then brought it home to program and validate. By the time everything was assembled and tuned, I had it running reliably on our drive base, enabling holonomic-drive capabilities for the team for the first time.
The game this year was Reefscape, where you had to build a robot to manipulate large playground balls (“algae”) and sections of thick OD PVC pipe (“coral”) into / onto different scoring areas of the field. As a team, we decided to focus on being an algae-specializing robot with a consistent climb.
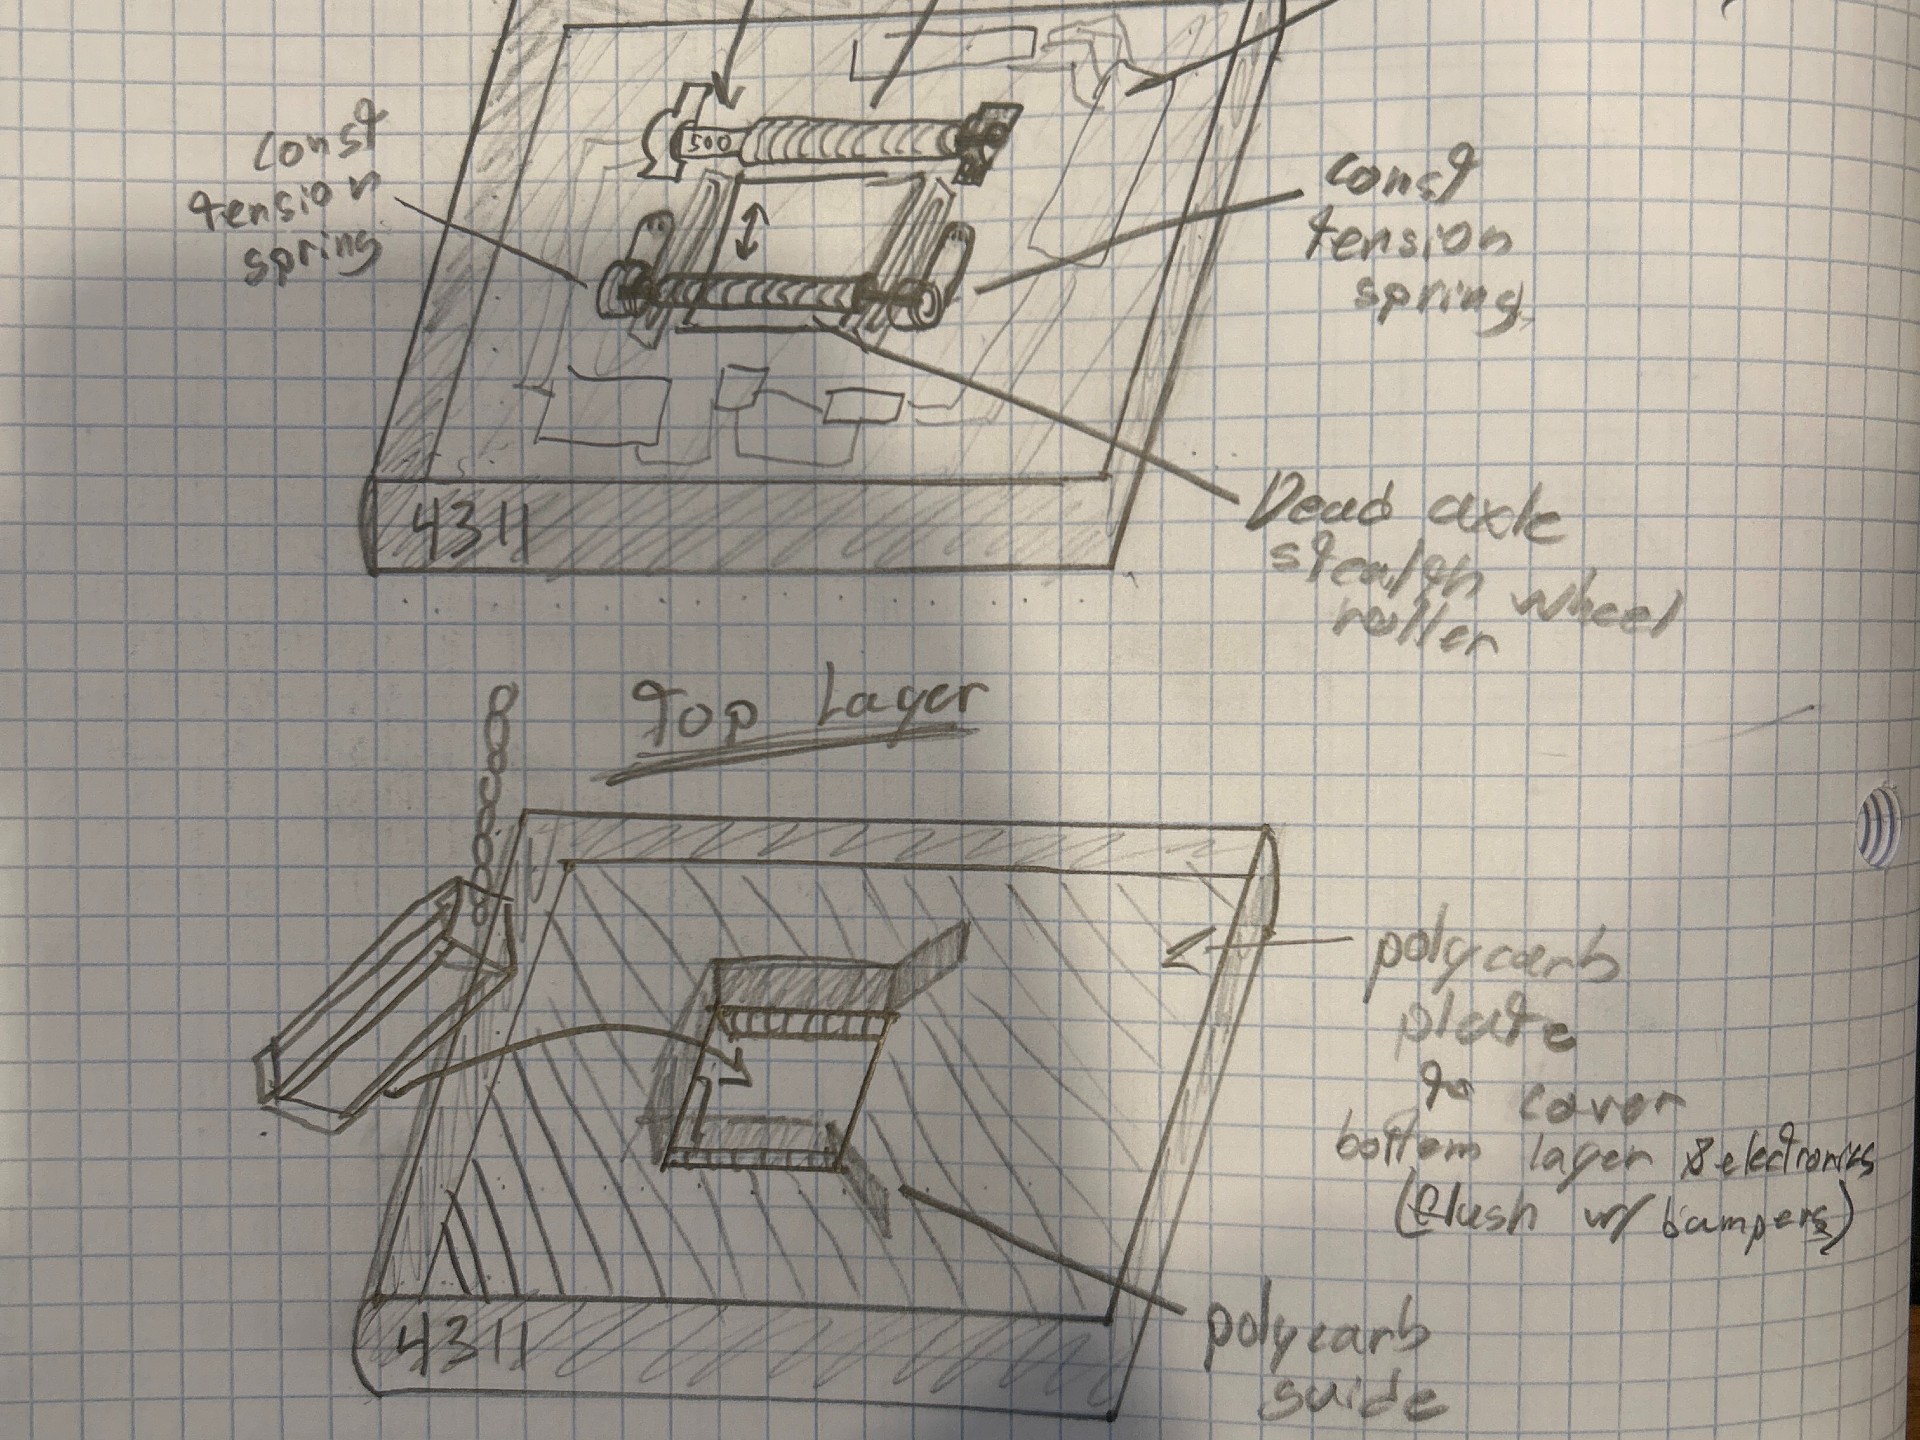
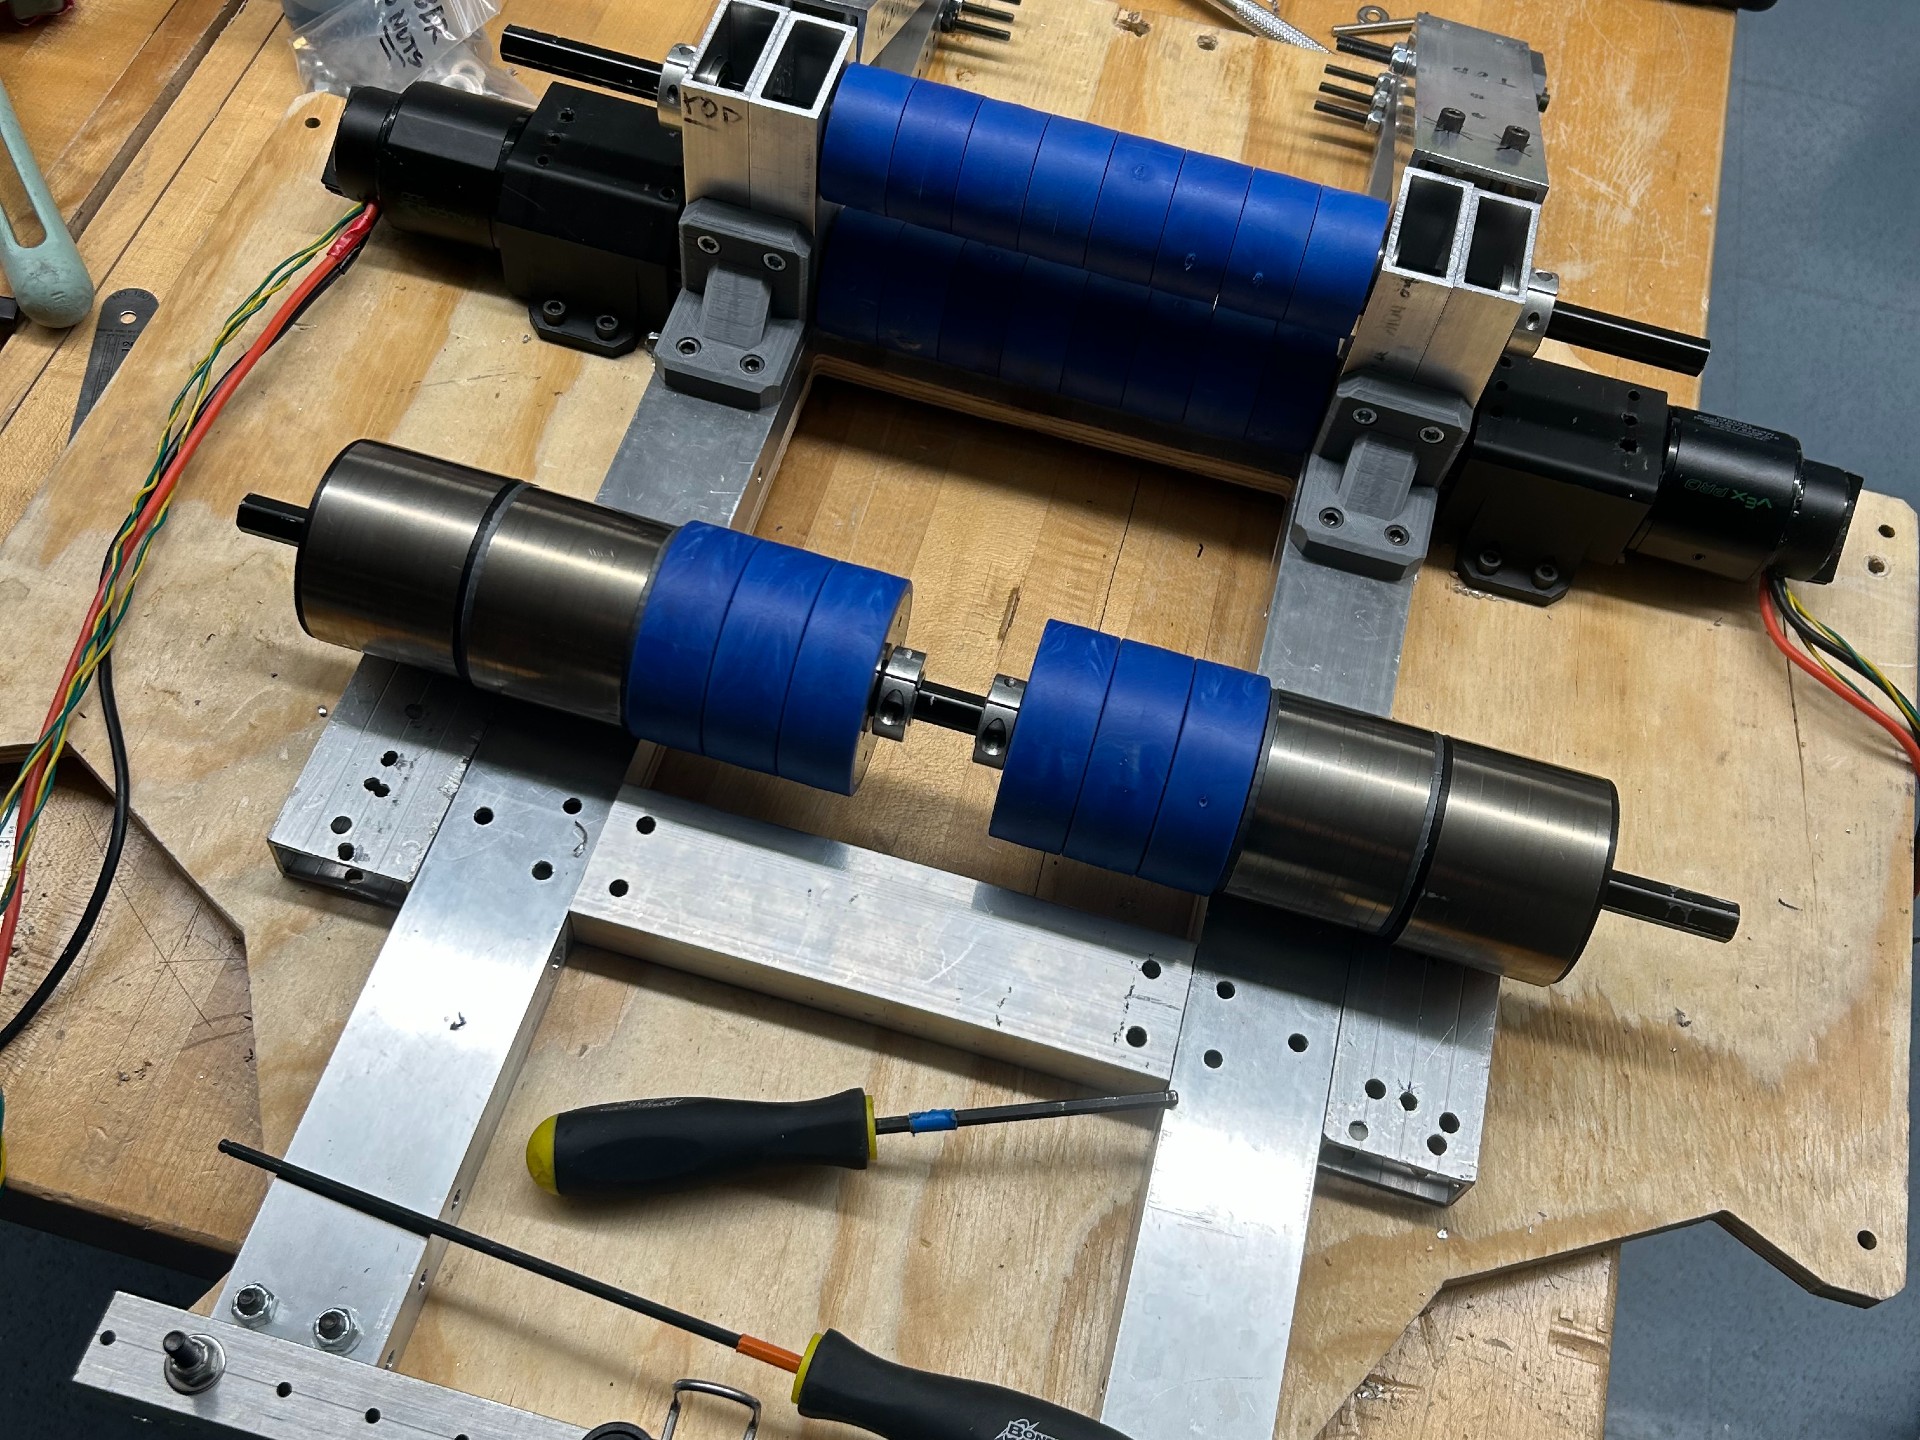
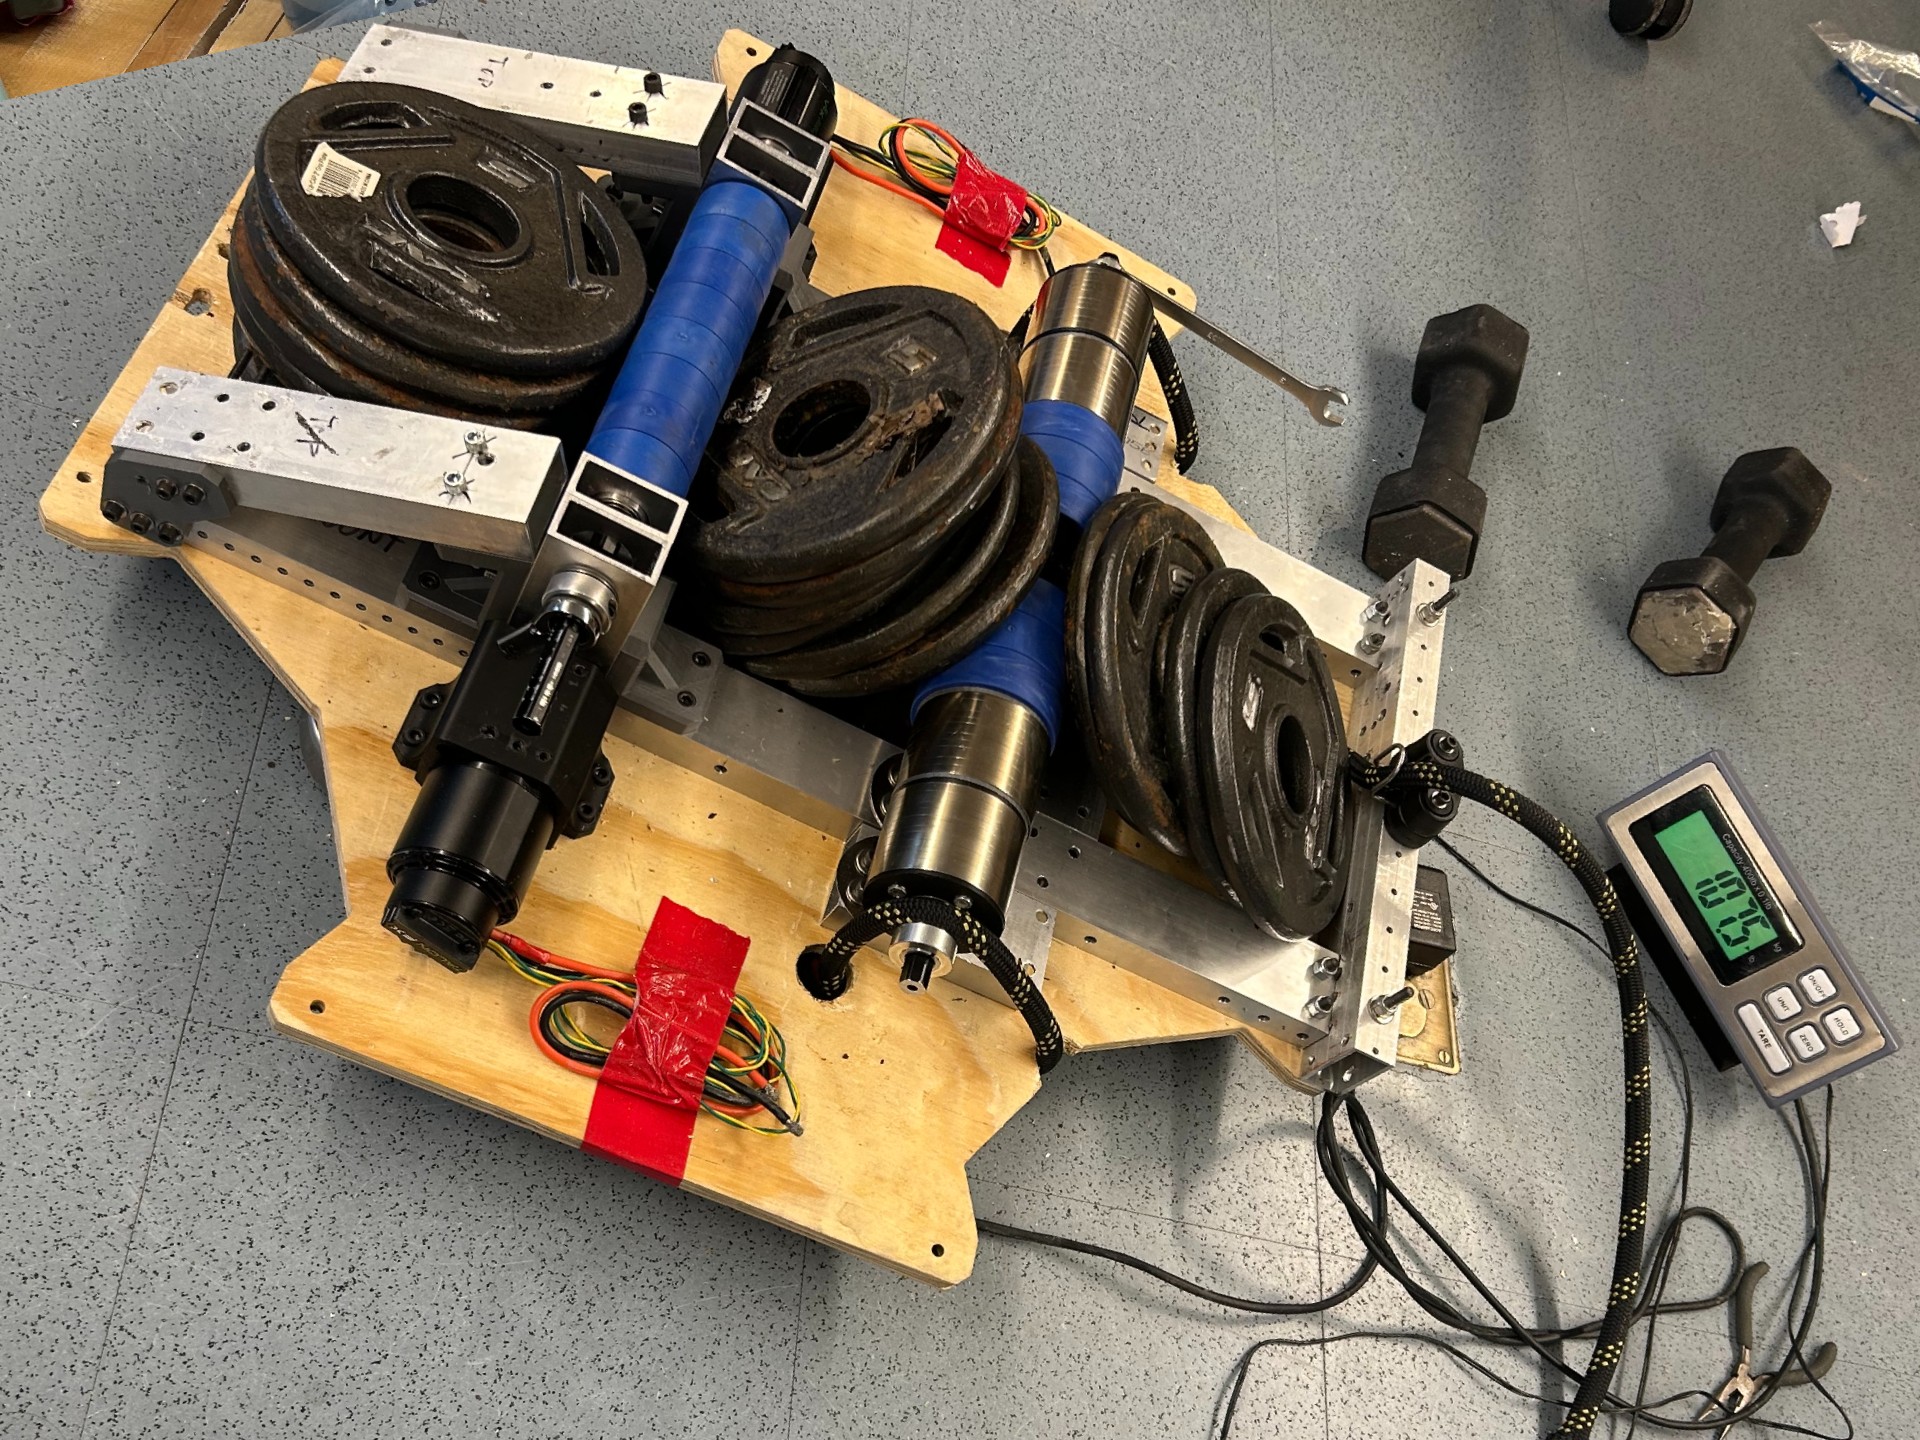
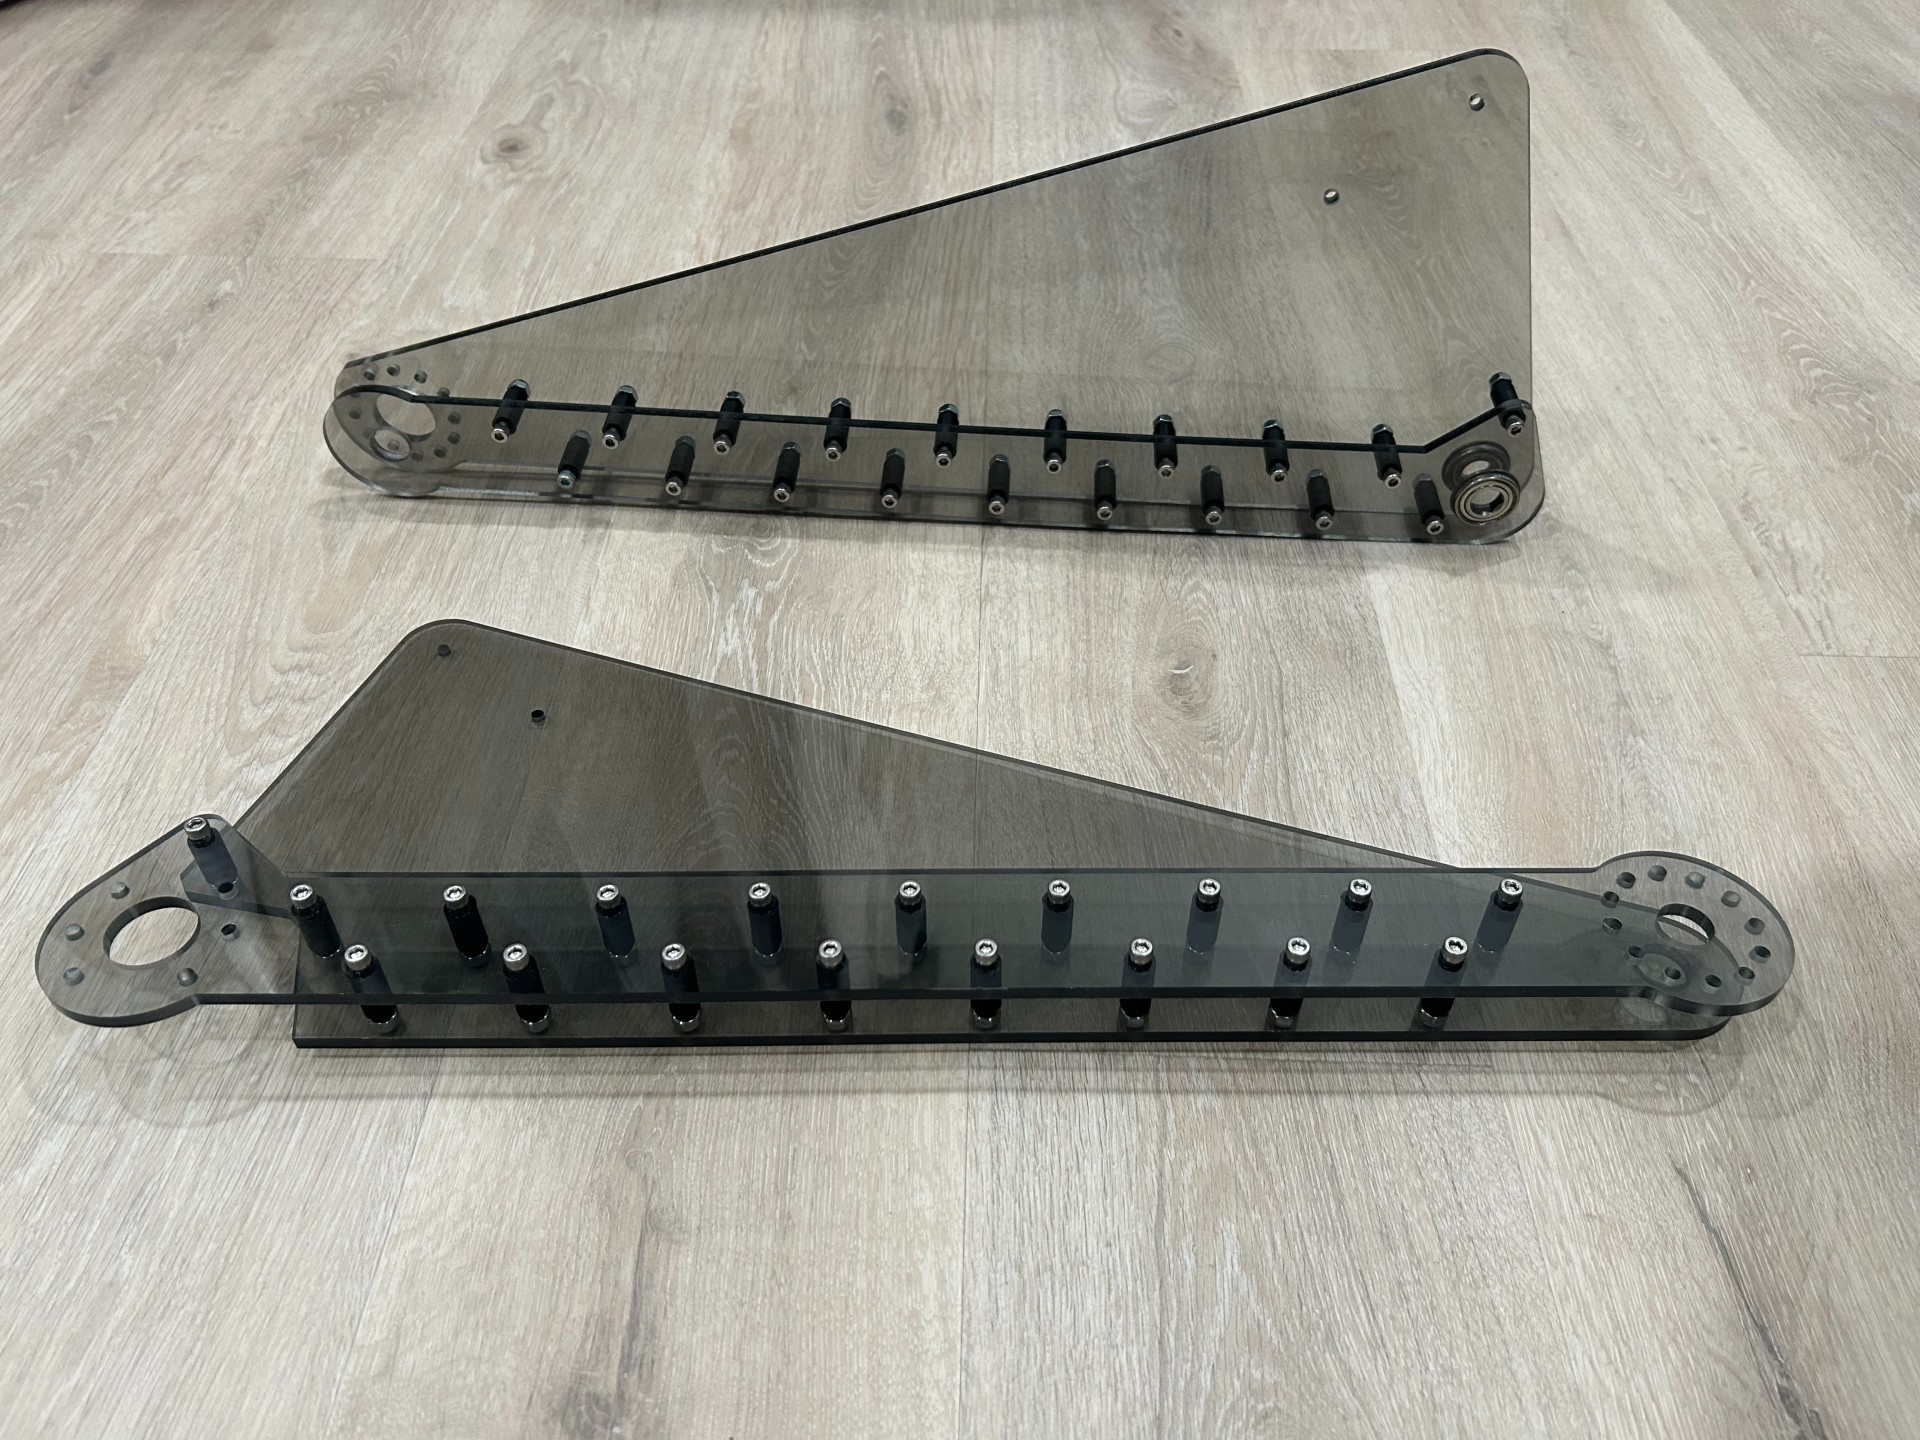
Since we wanted to be a strong climb robot this season, I spent a good portion of the beginning of build season designing and building a unique climber concept that used constant force spring compression plus dense rubber wheels to grip the cage and “roll” the robot up using only compressive force, driven by a dual side 125x1 gearbox reduction actuation. The axle was mounted on ratcheting wrench heads so it could hold position mechanically once a desirable climb height was reached. It was intended to be single-use and would be primed using a winch and cam system. Given the complexity and the amount of force we’d need to store in the springs for compression, we ultimately scrapped the design — but it was a fun build to prototype and load-test (see images).
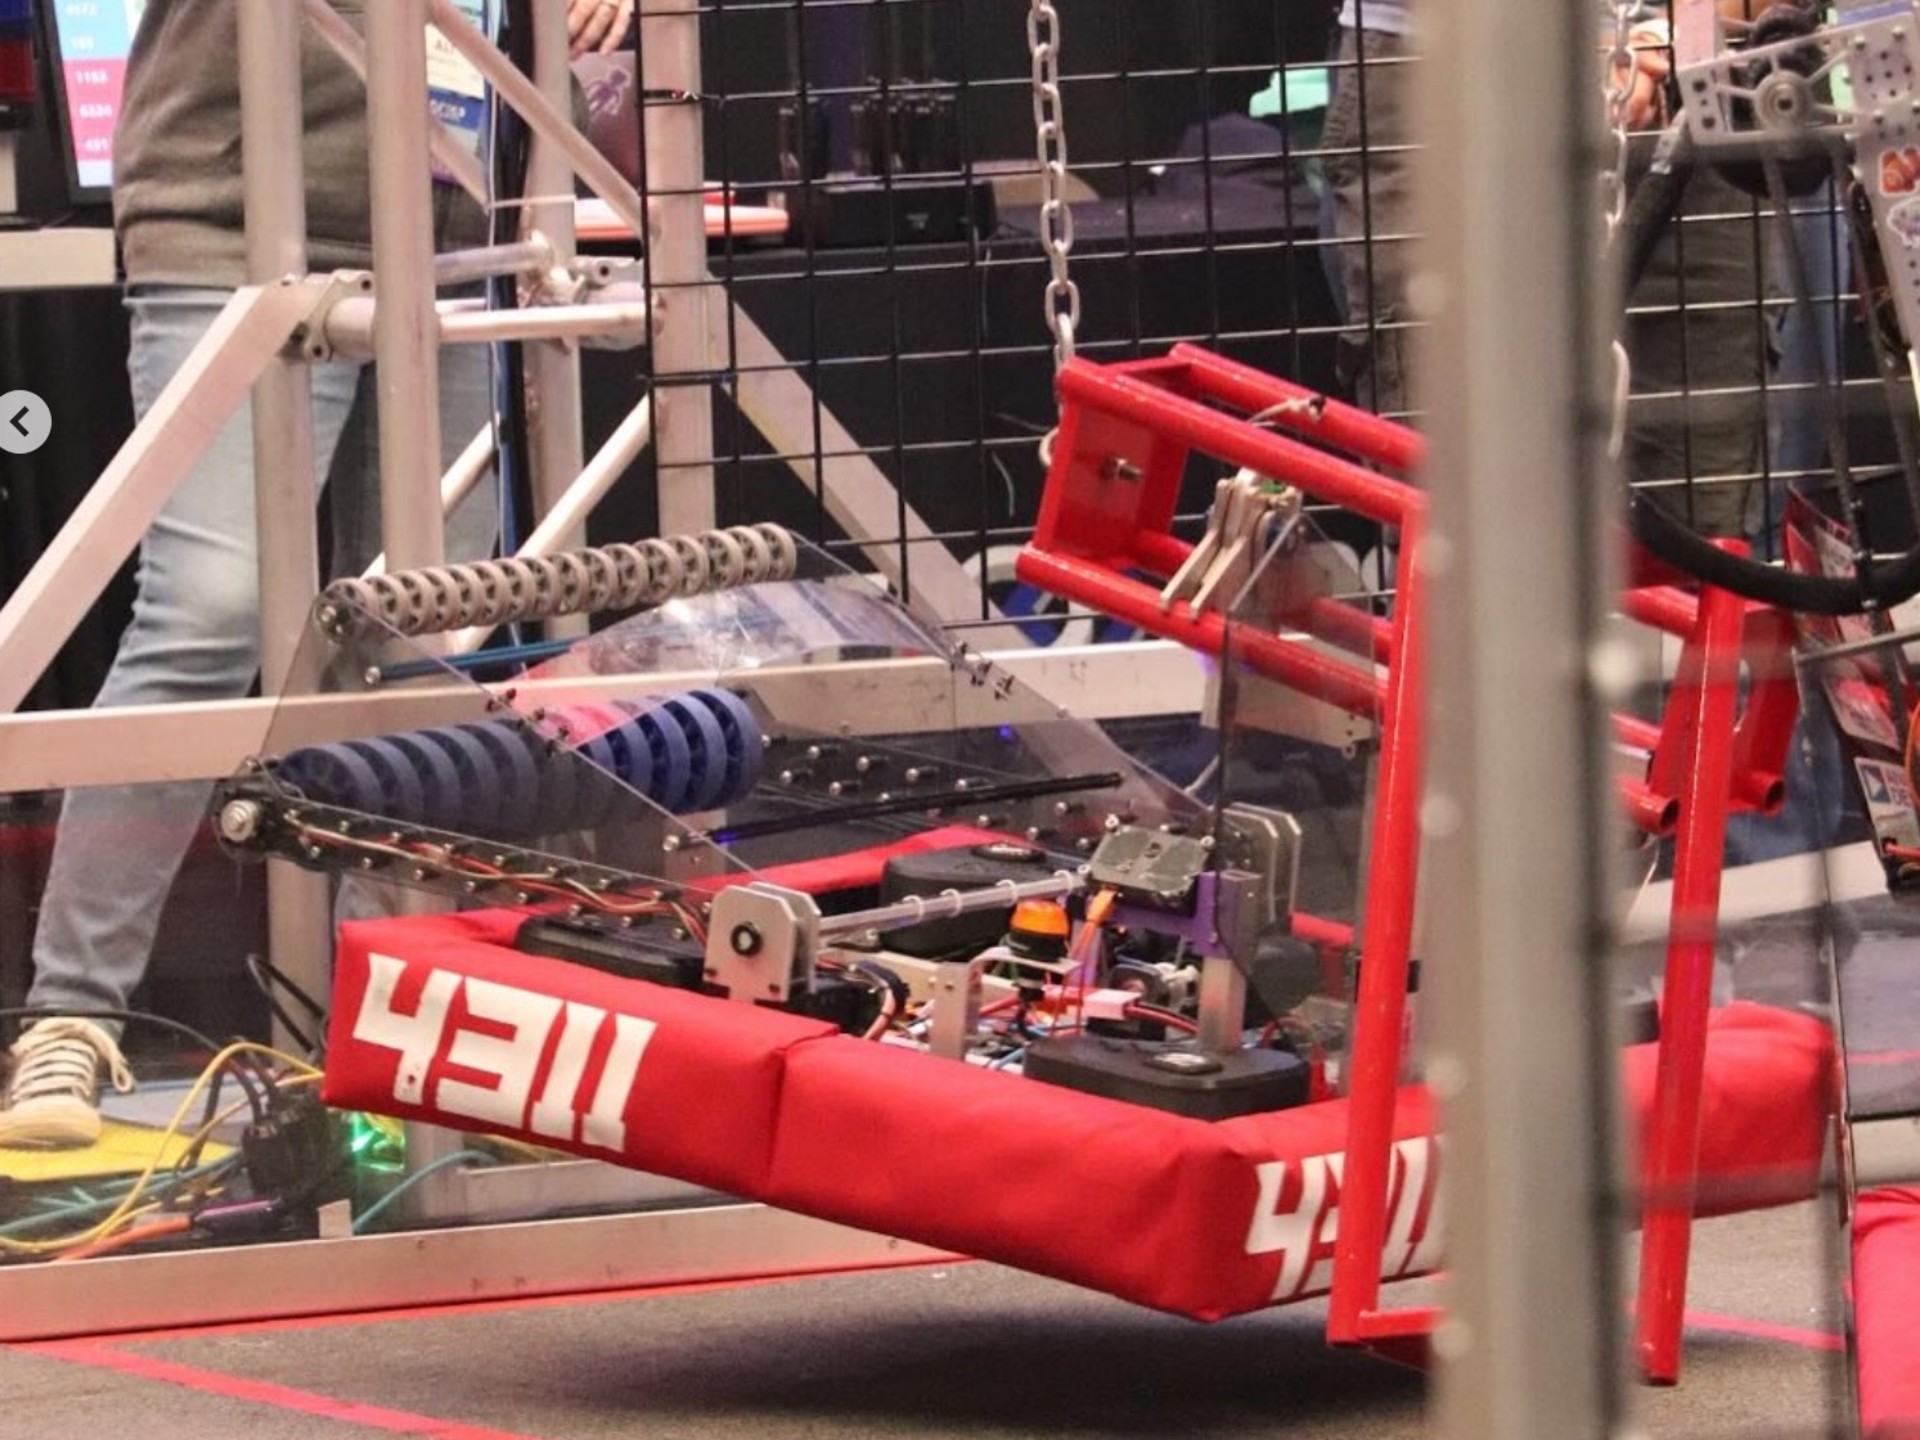
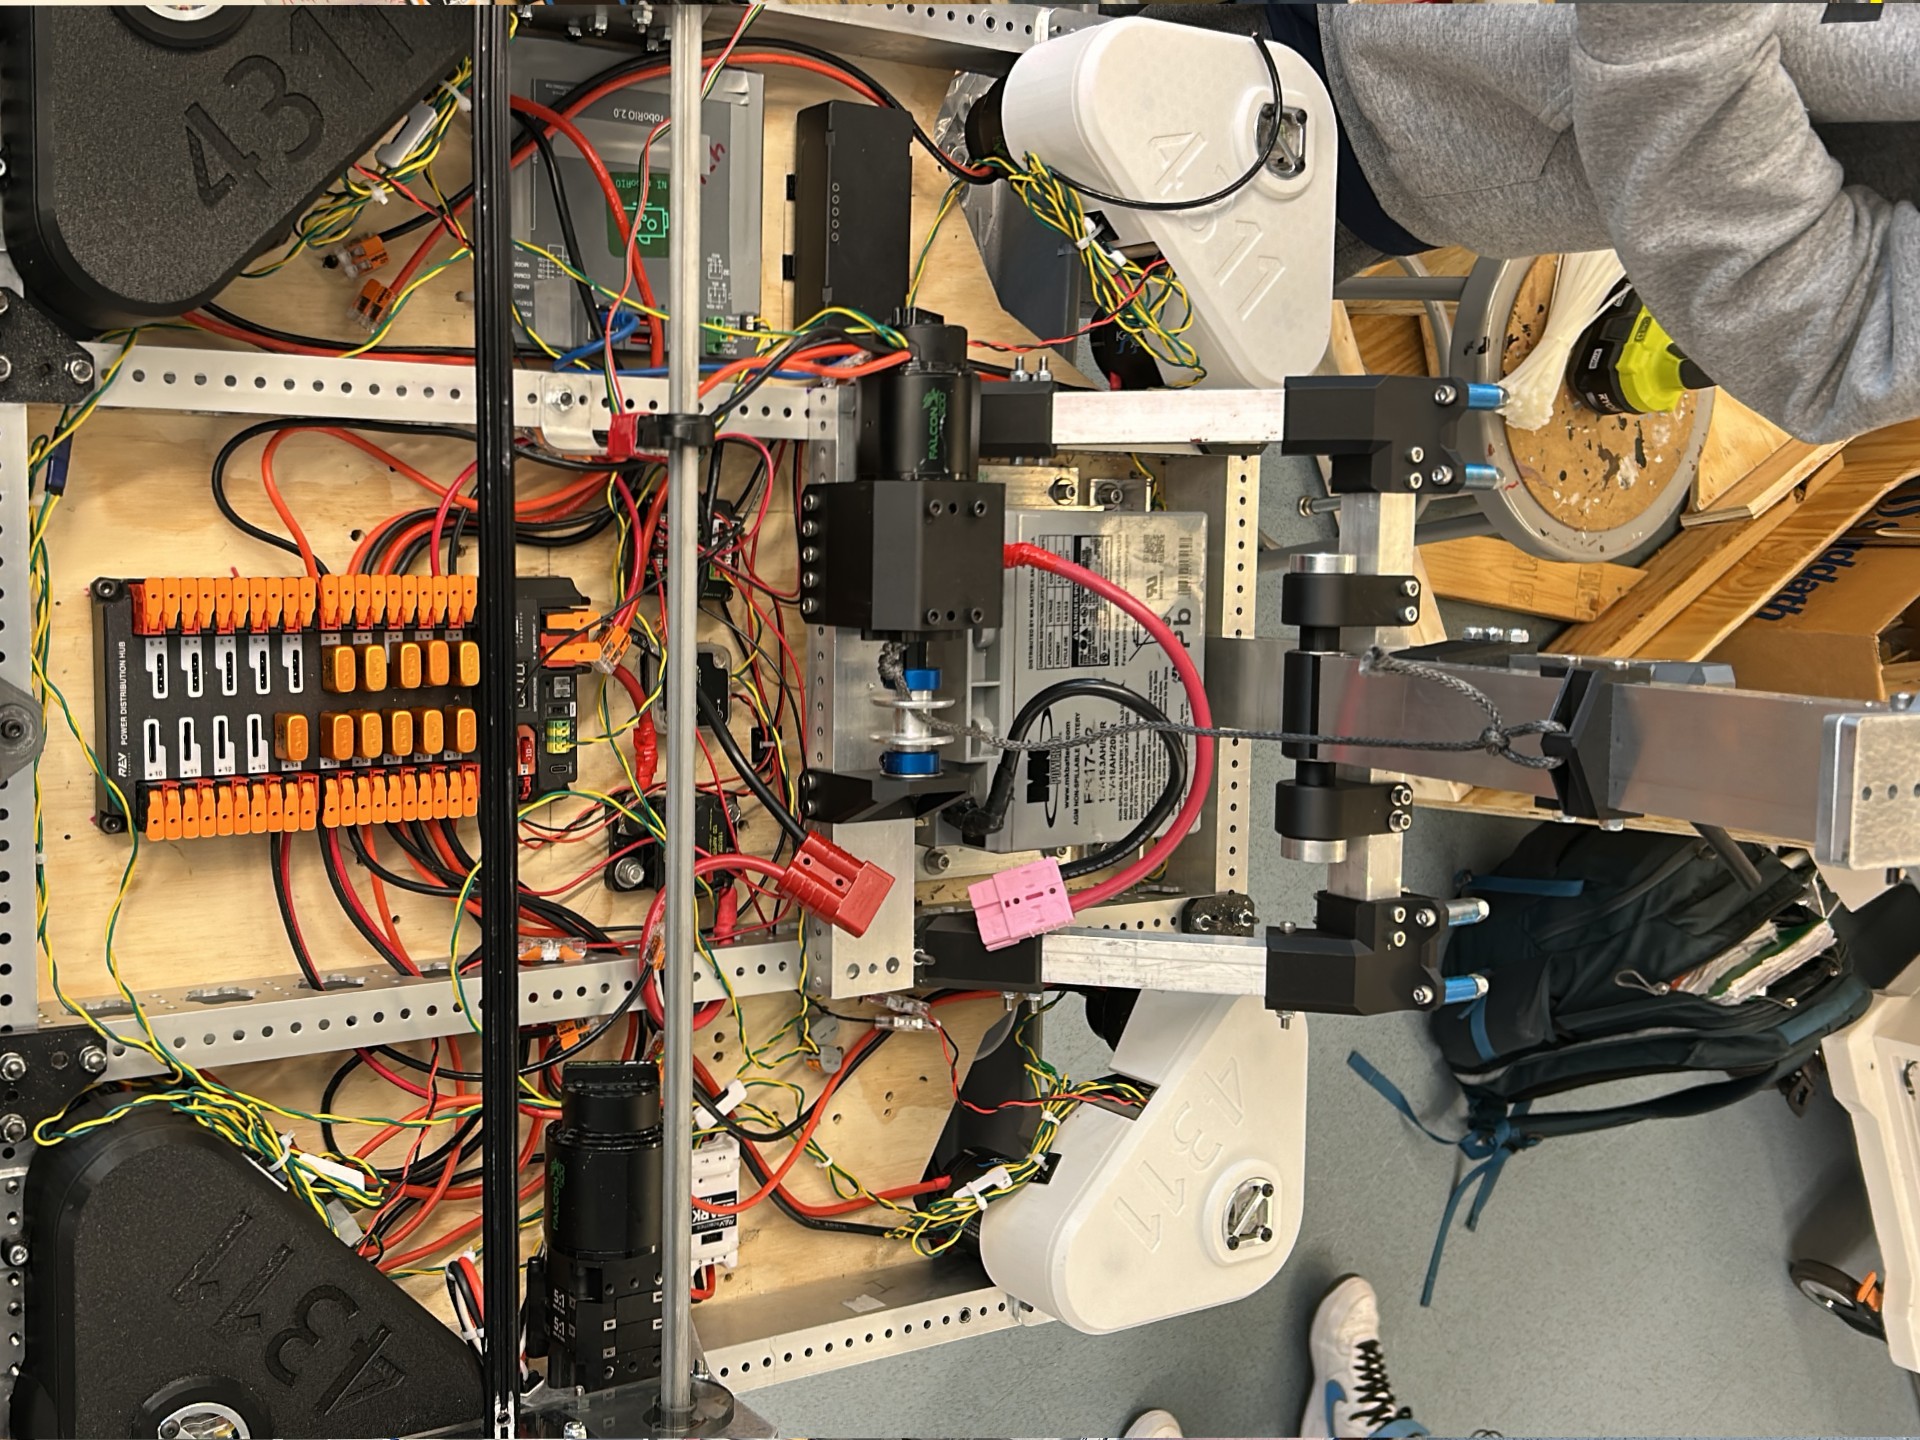
Eventually I got around to designing the rest of the robot, and as usual my early direction took inspiration from Ri3D robot designs. We landed on a simple rotating-arm algae intake that we could integrate cleanly onto our subframe and use to score processor points (the low opening for the large balls). After iteration and prototyping, I came up with a dual-paneled layout for the intake arms to distribute the torque load and improve overall structural strength. We used 1/4” polycarbonate sheets, staggered with 3D-printed spacers. We also added a second row of compliant wheels so the same mechanism could manipulate coral pieces and score them in the L1 level on the Reef.
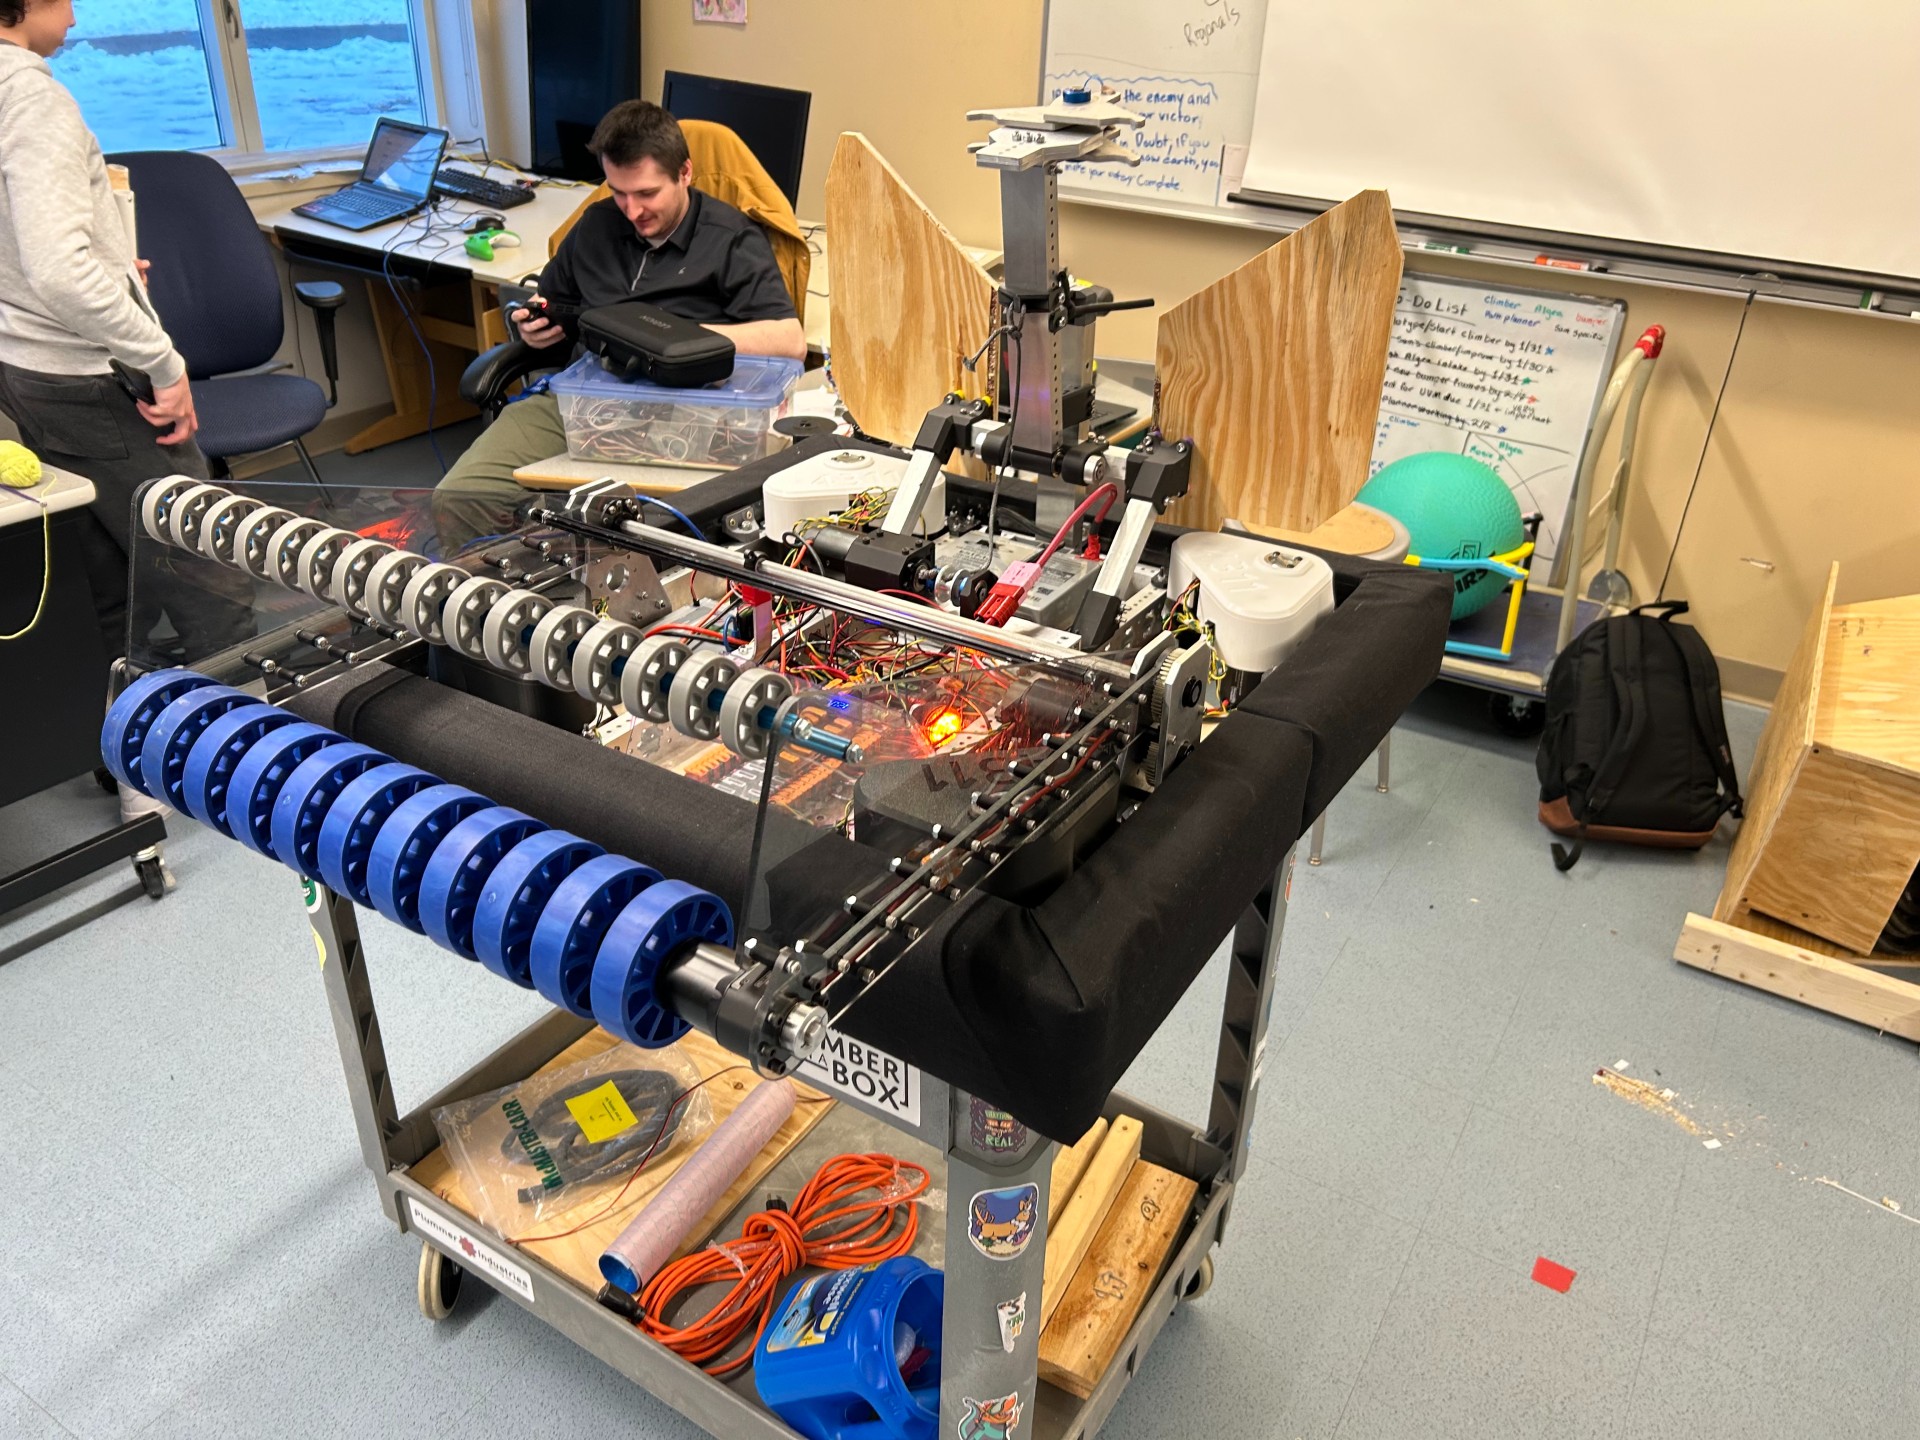
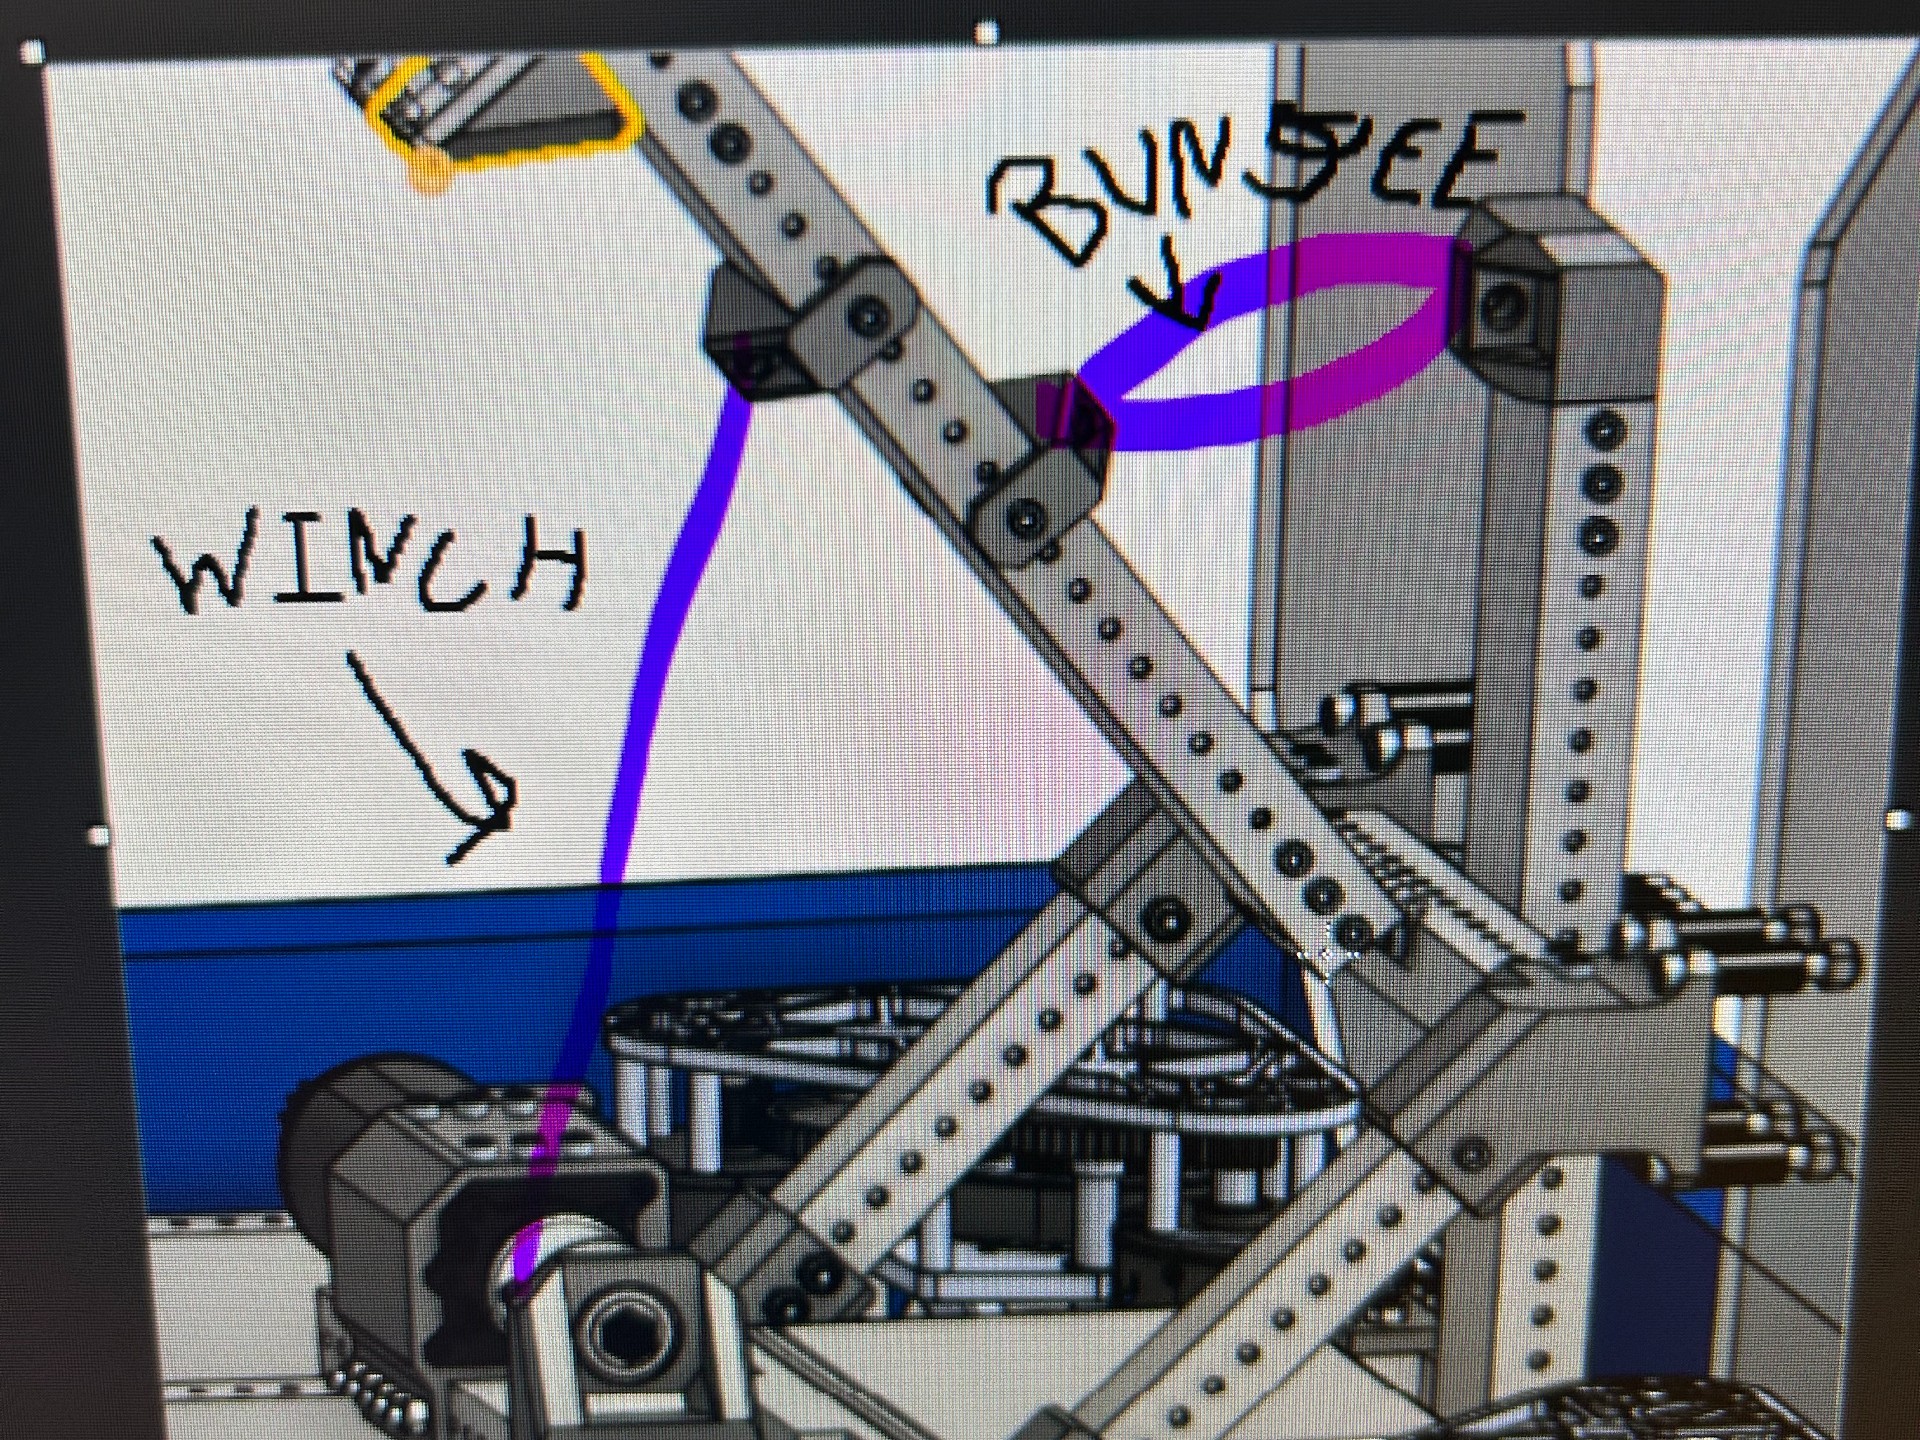
The final climber came together last-minute, but it ended up being extremely reliable. It used a raised rotational axis, and the hook geometry was inspired by 118’s “everybot.” We positioned it so it could spring load into place when it was time to climb, and store itself inside the robot the rest of the match. Once hooked onto the cage, we ran a winch to pull the hook toward the robot’s CG, pivoting the climber arm on its axis and lifting the robot into the air. We also added polycarbonate panels to protect the robot and help guide the cage into the hook mechanism.

After our first competition we implemented vision tracking using a Limelight camera to automate processor scoring. The AprilTag-reading vision system communicated with the Limelight, using PhotonVision and OpenCV to enable pose estimation for field odometry (something our team has never done before). Below are some videos from our initial test setup running autonomous aprilTag alignment while we tuned the system for the first time:
Overall, I was happy with the robot’s performance regardless of our competition results this season. We had essentially no critical match failures and performed extremely consistently, which is exactly what we were aiming for. Here is one of the matches we played during the district championship in Springfield:
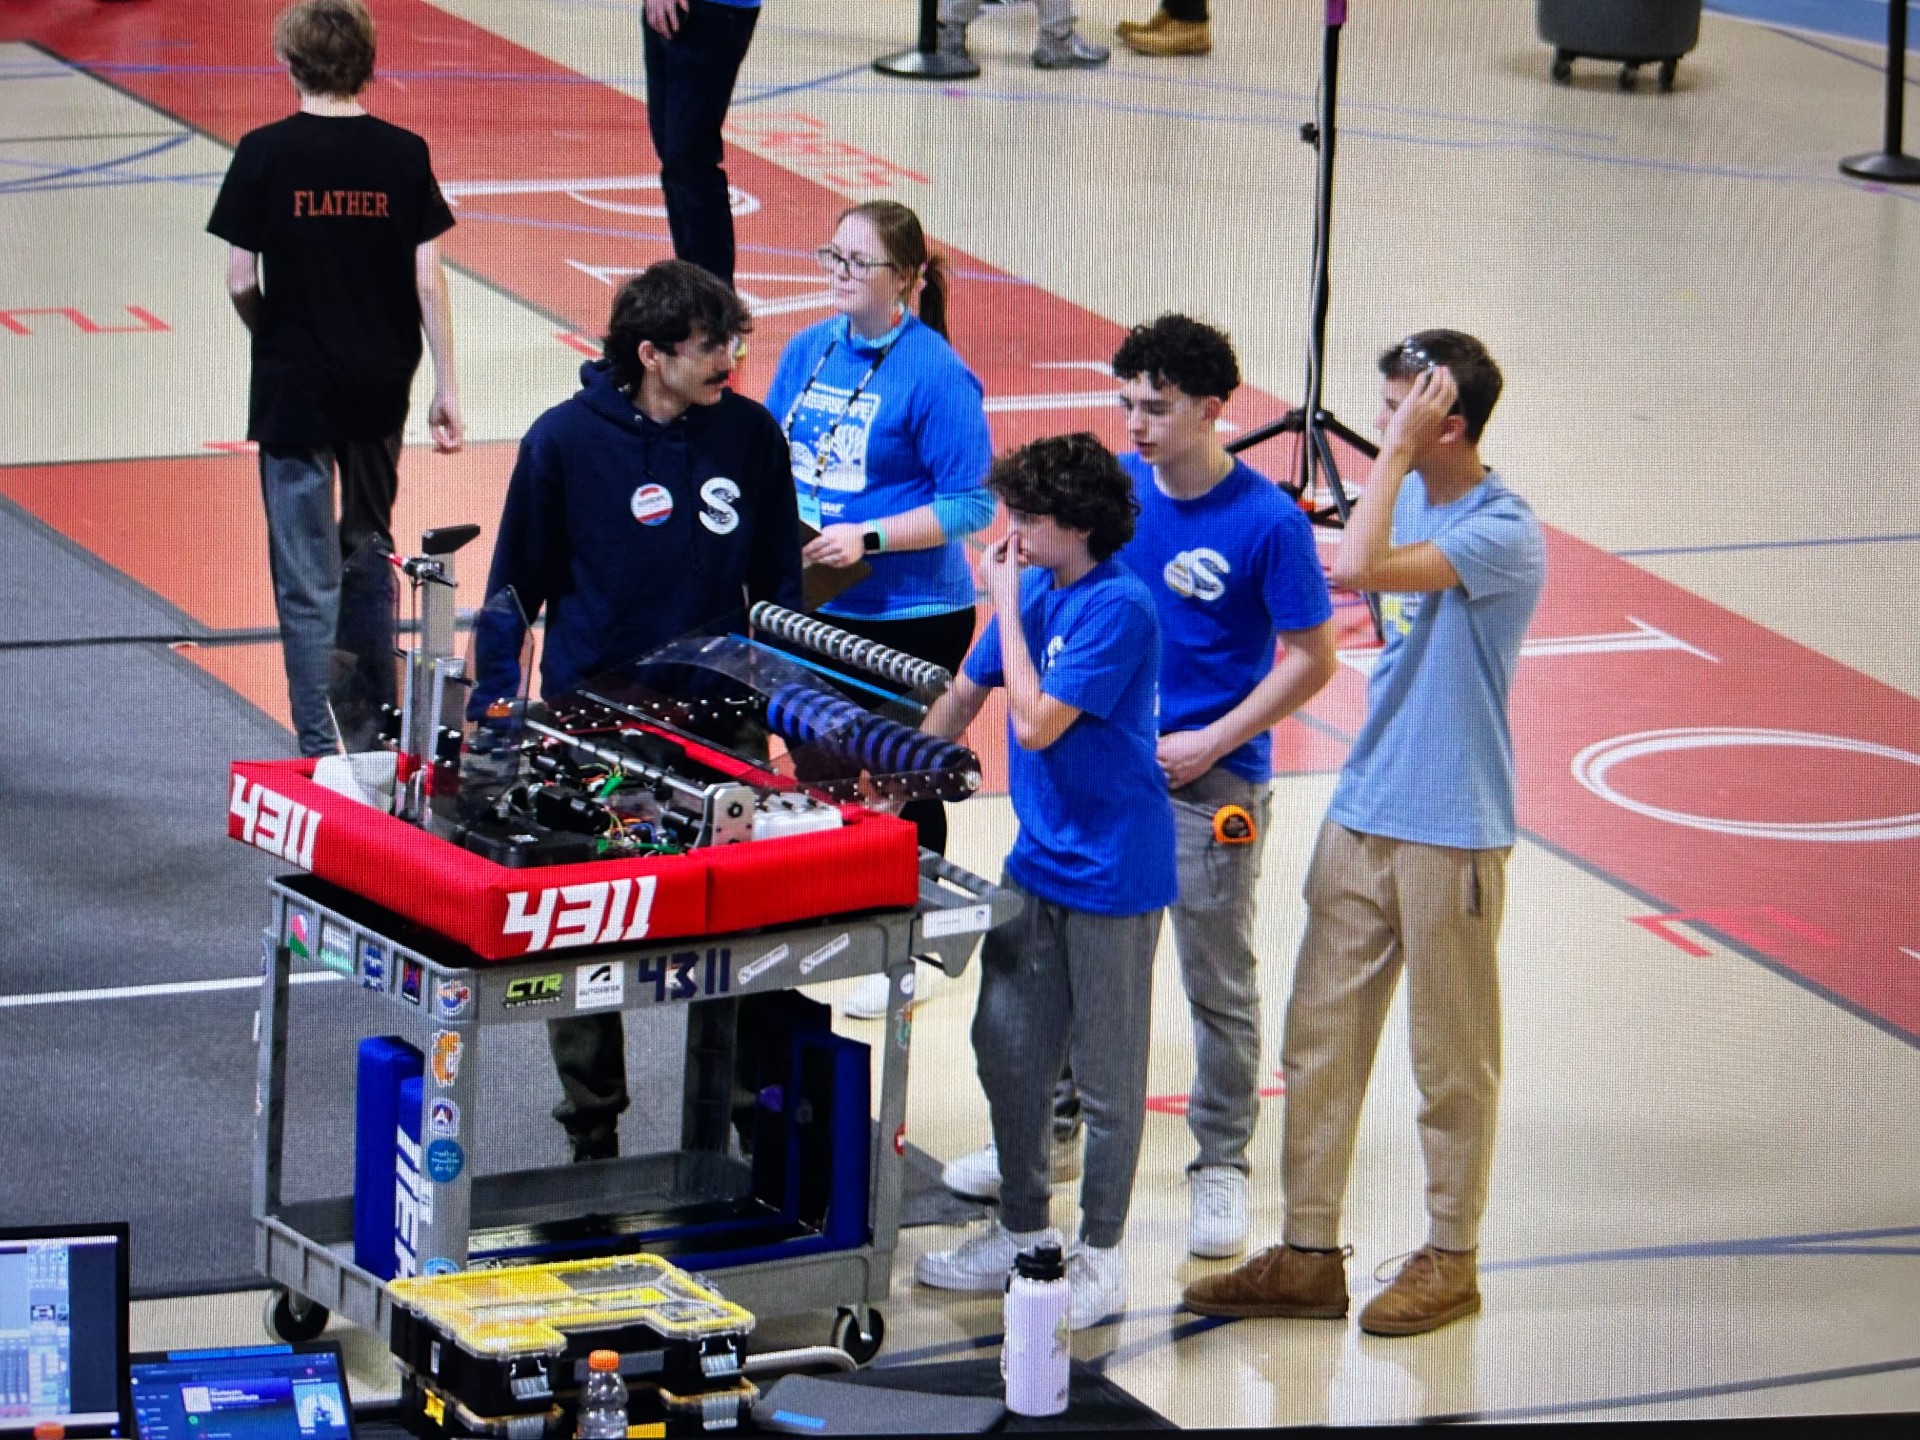
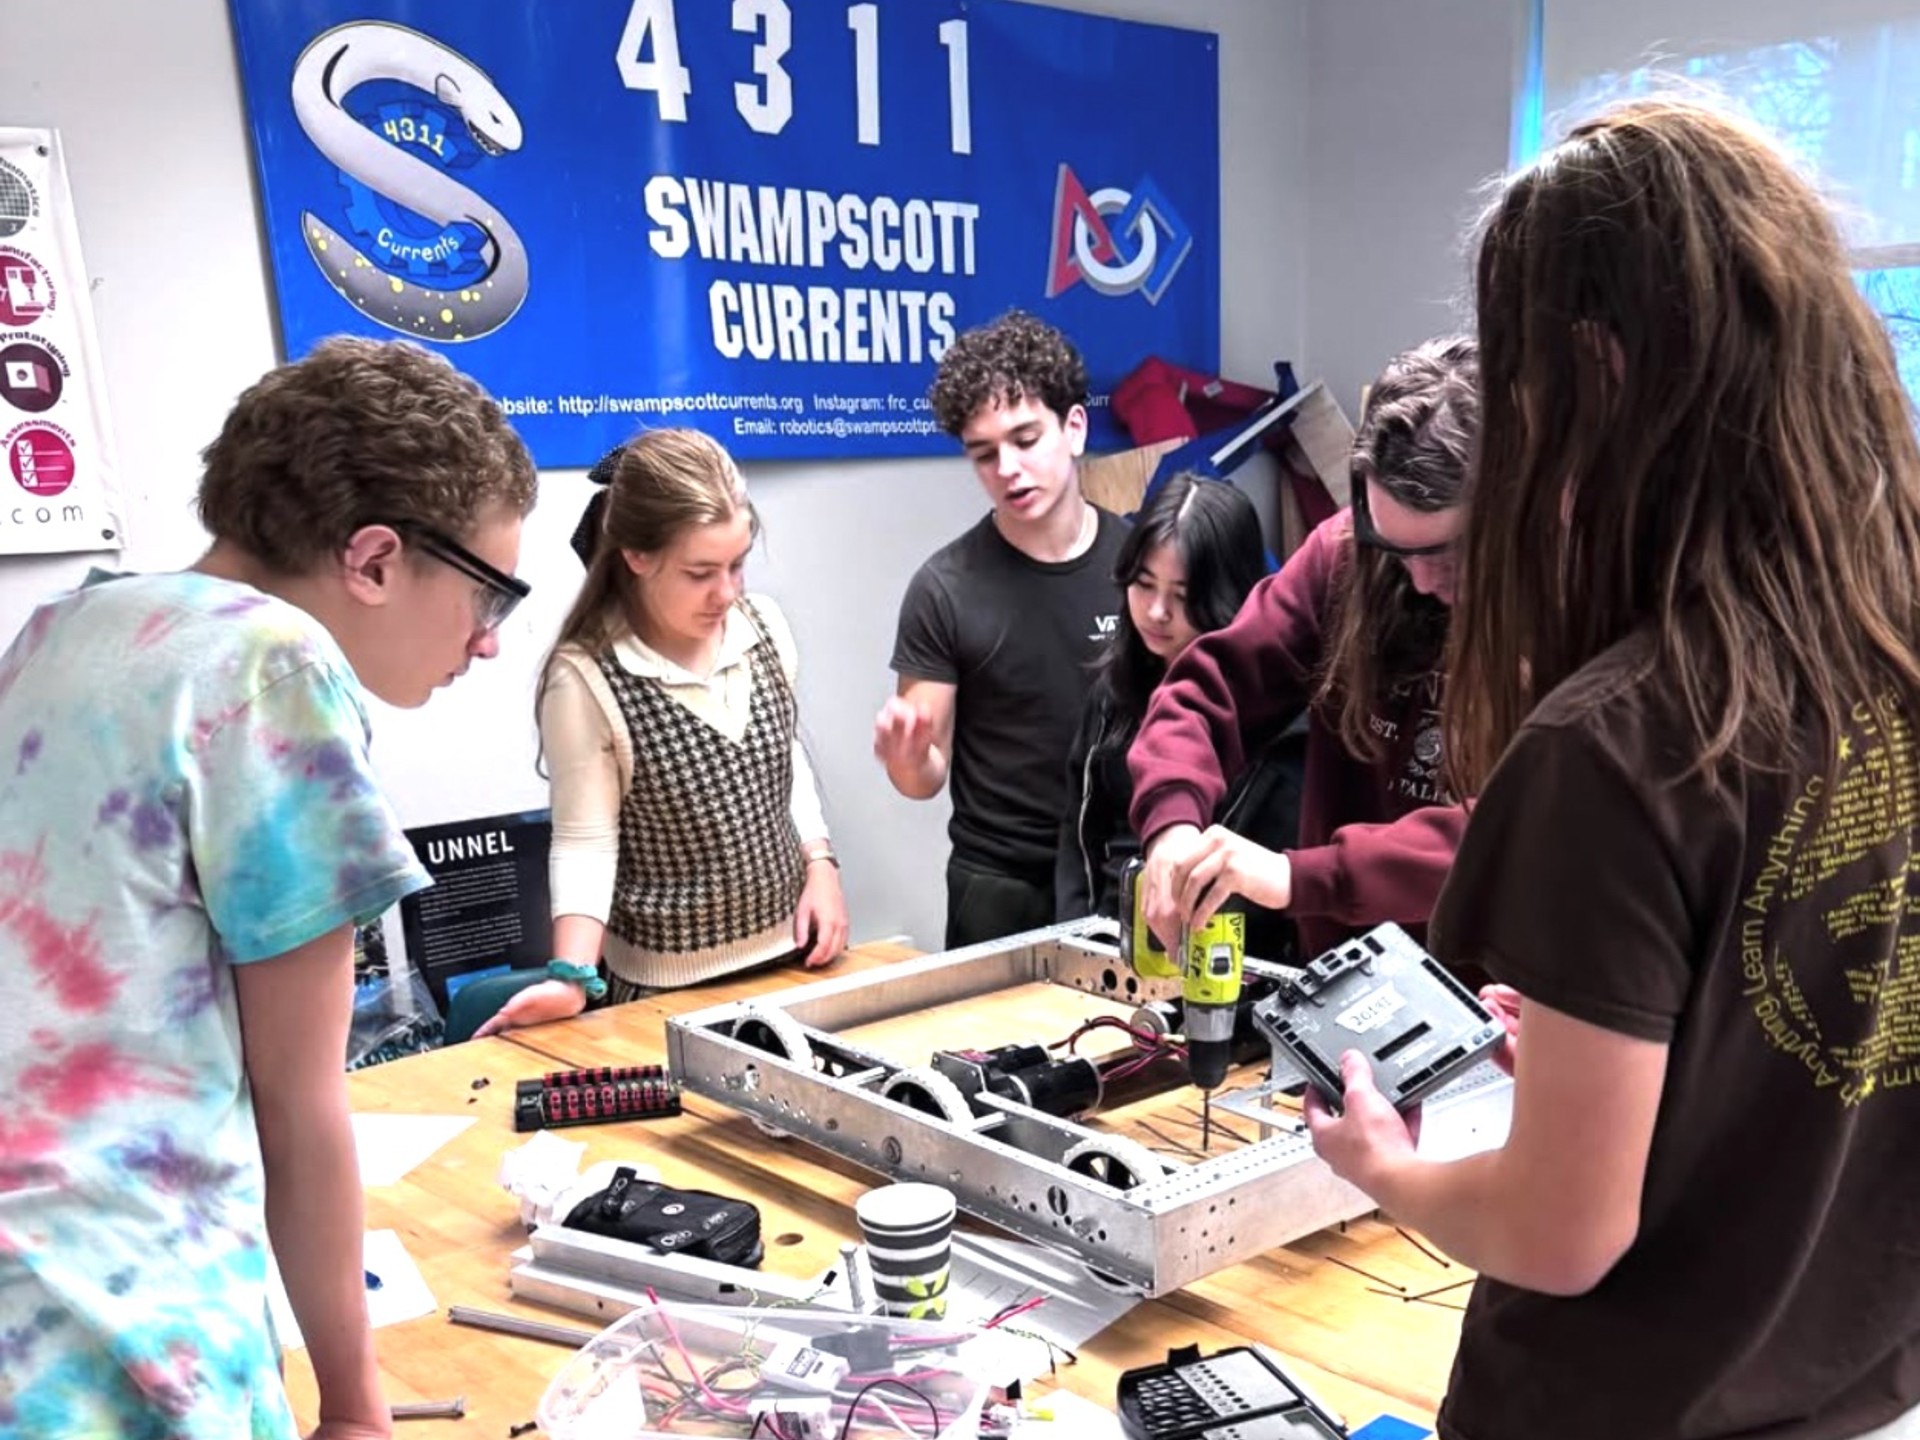
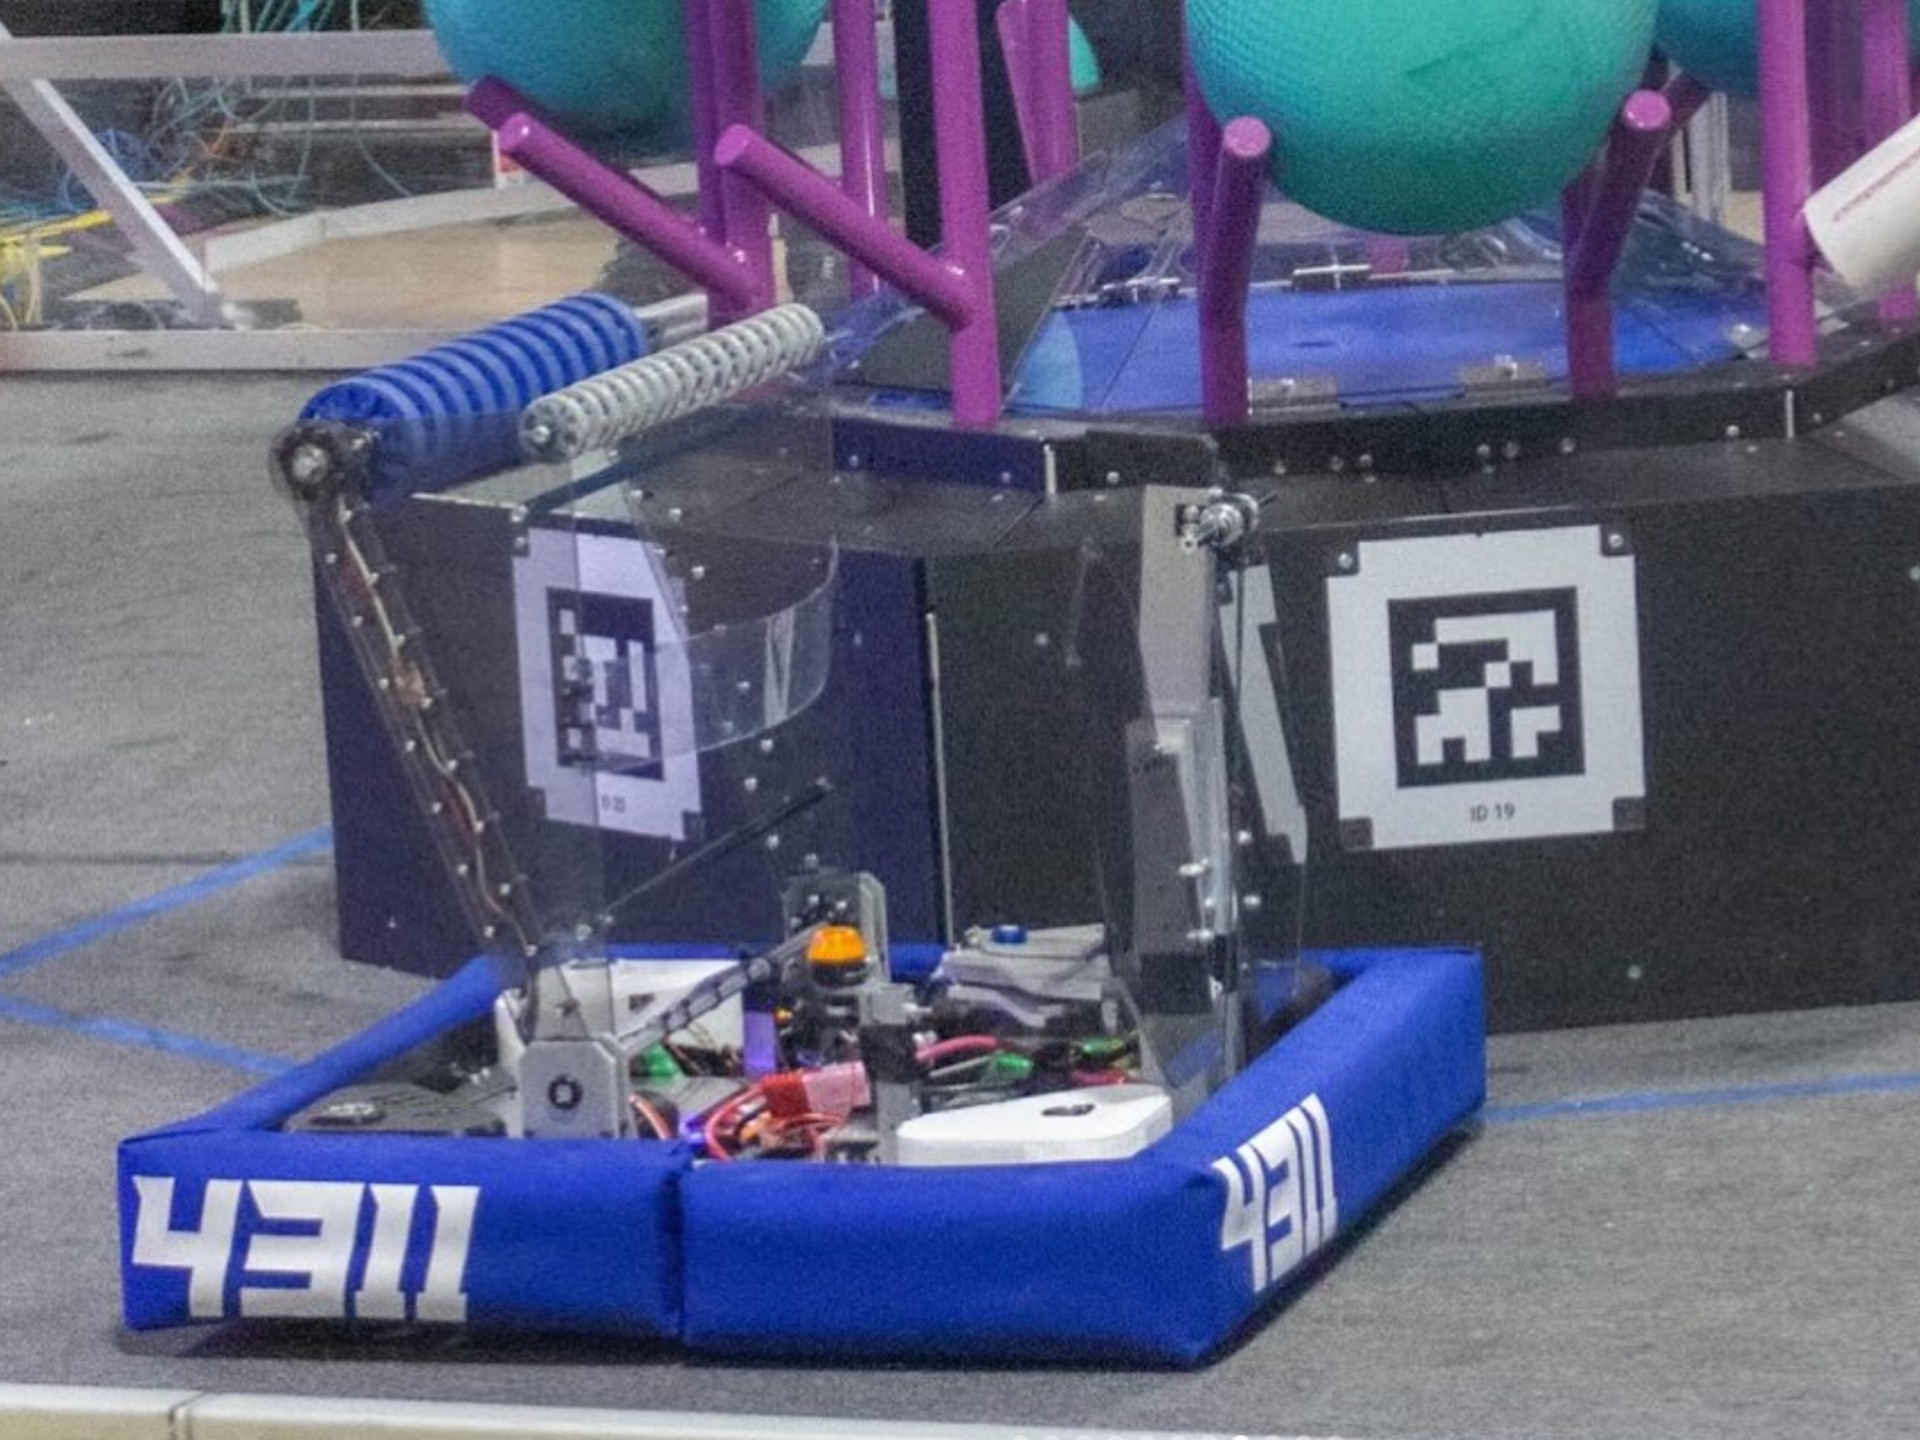
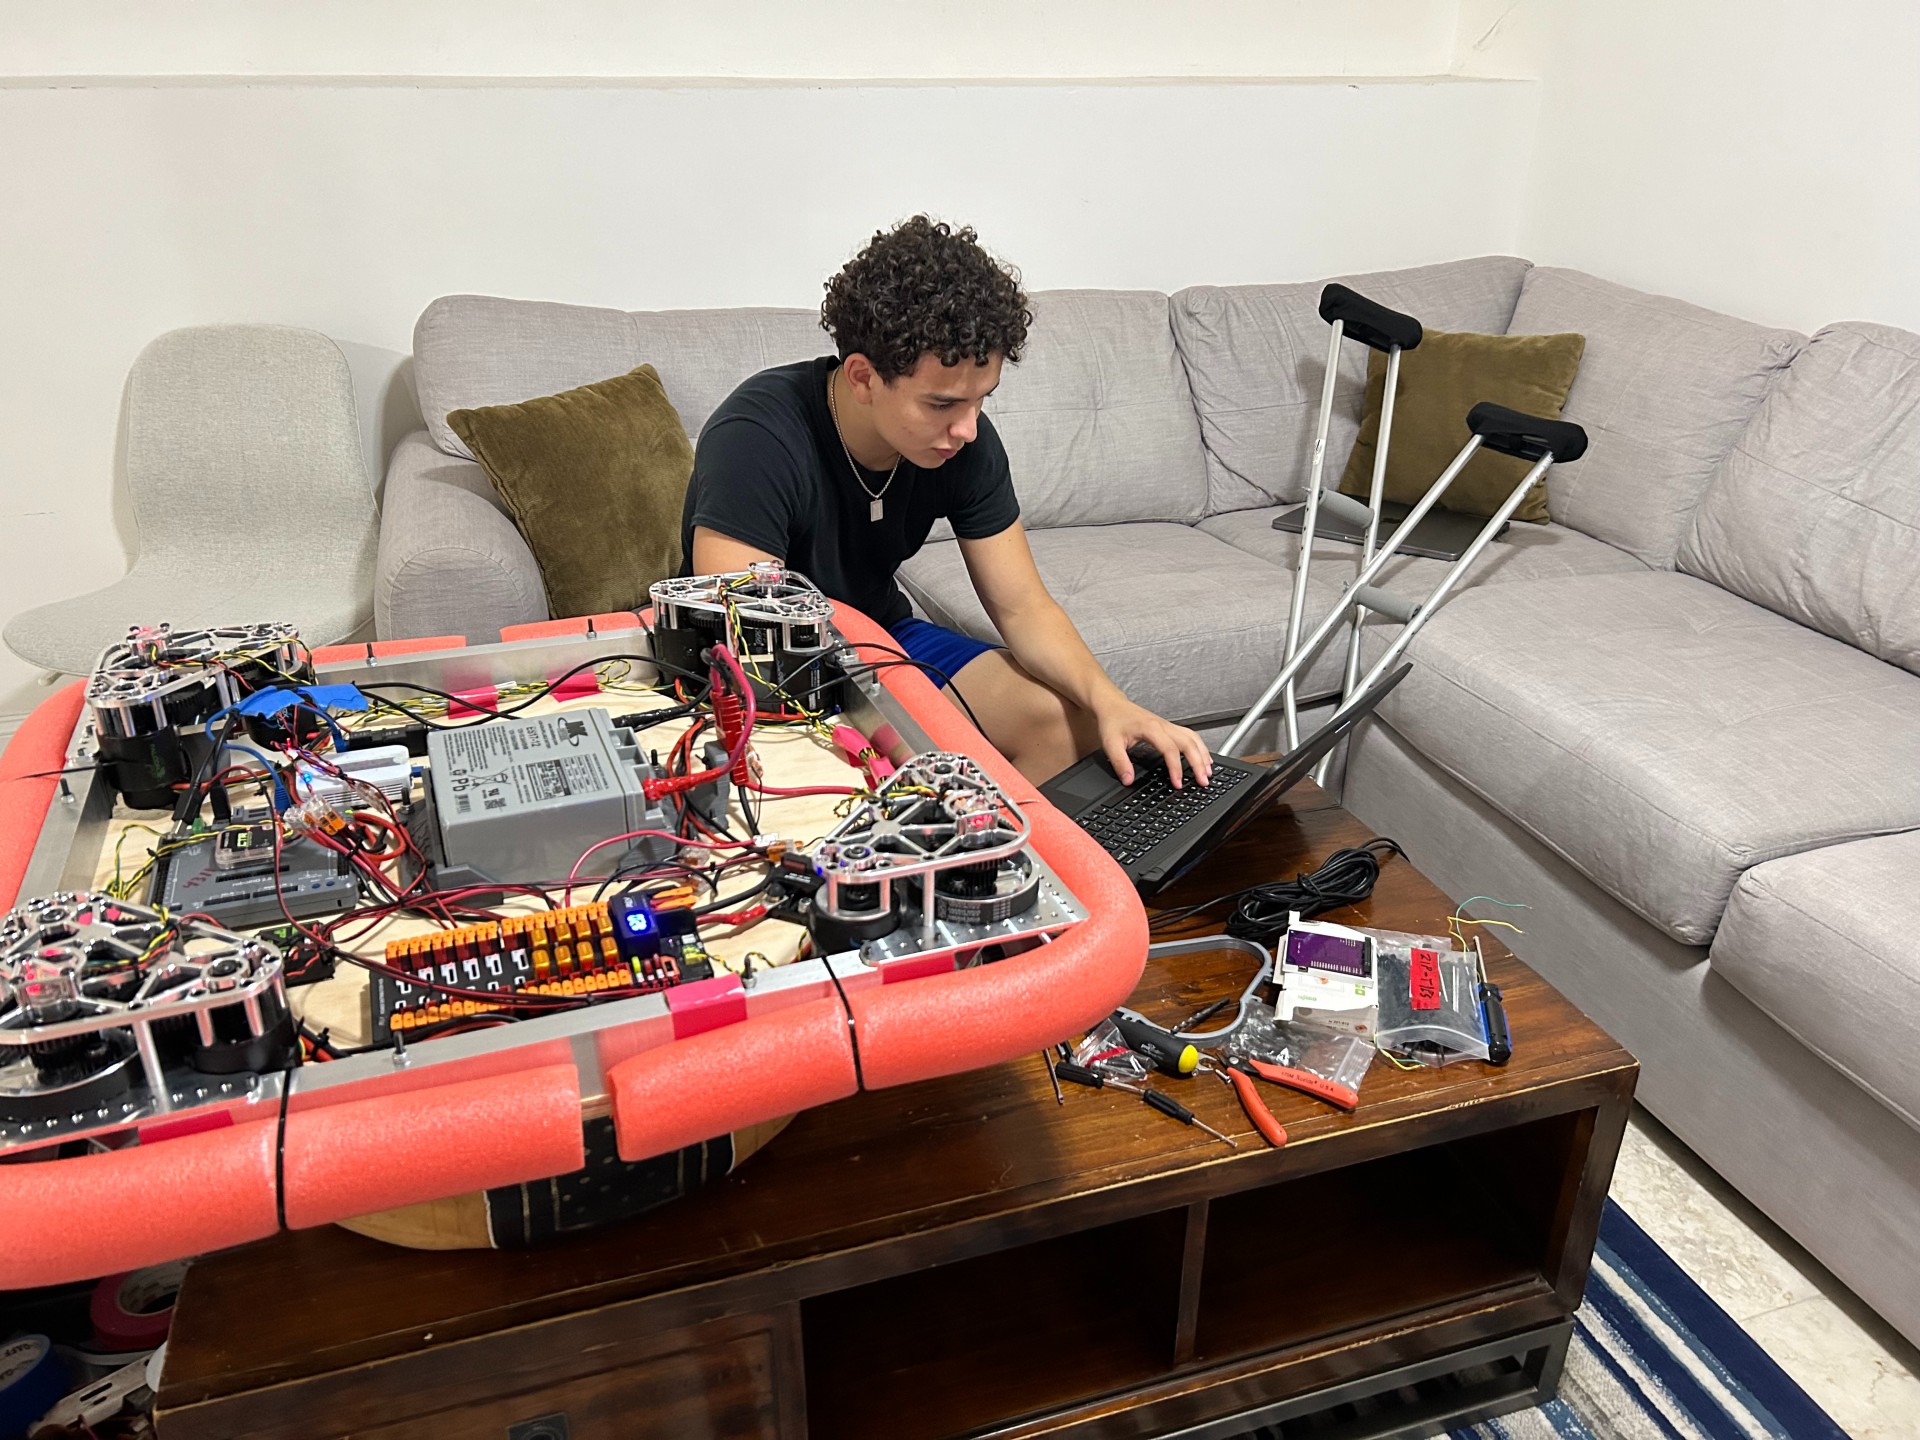
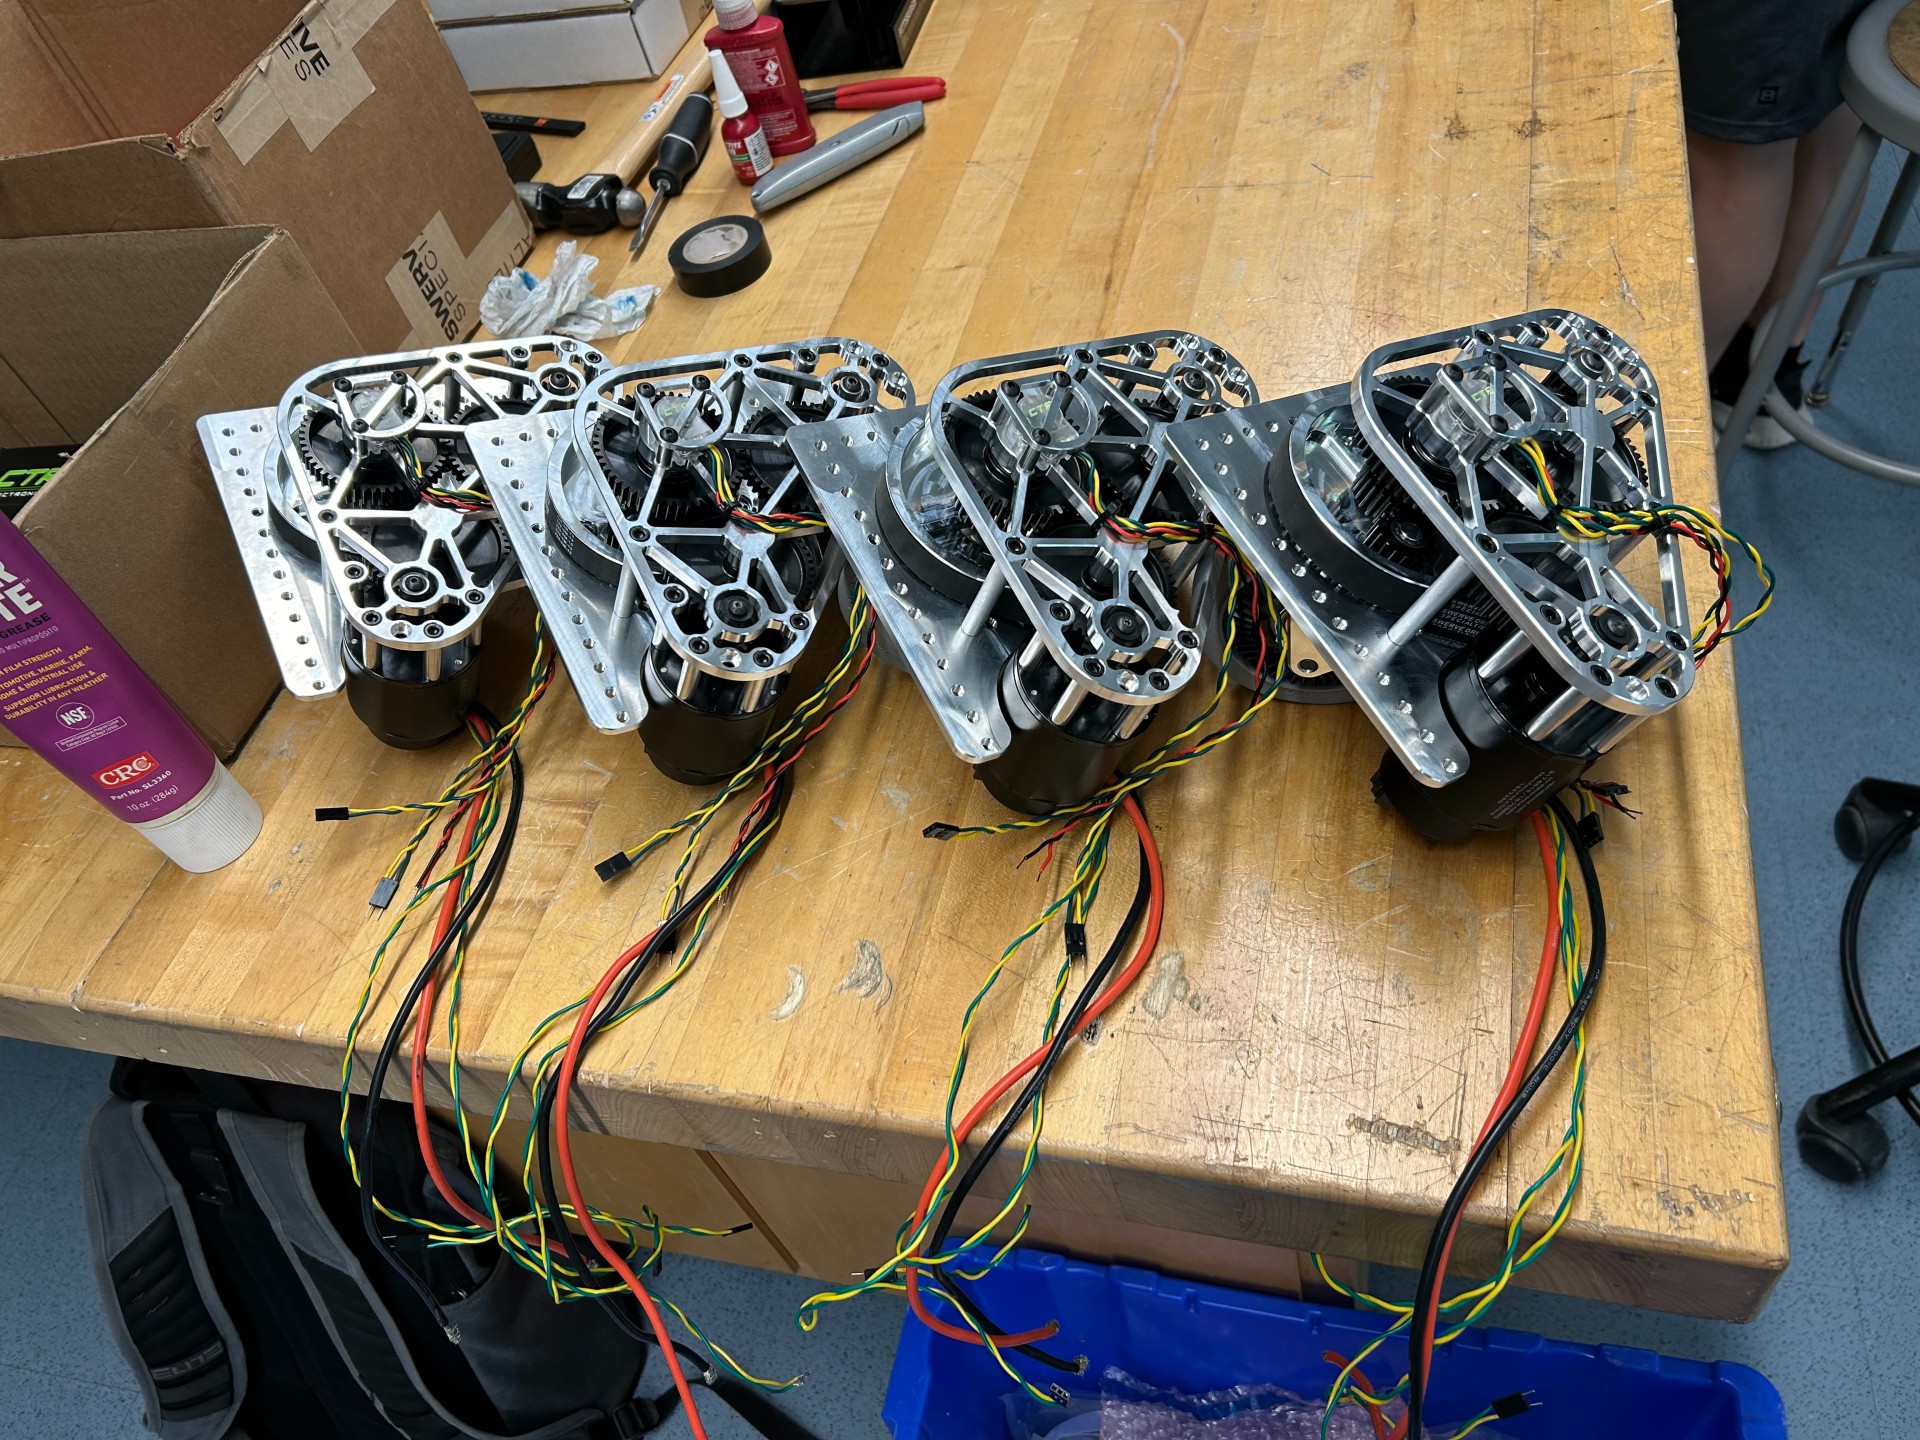
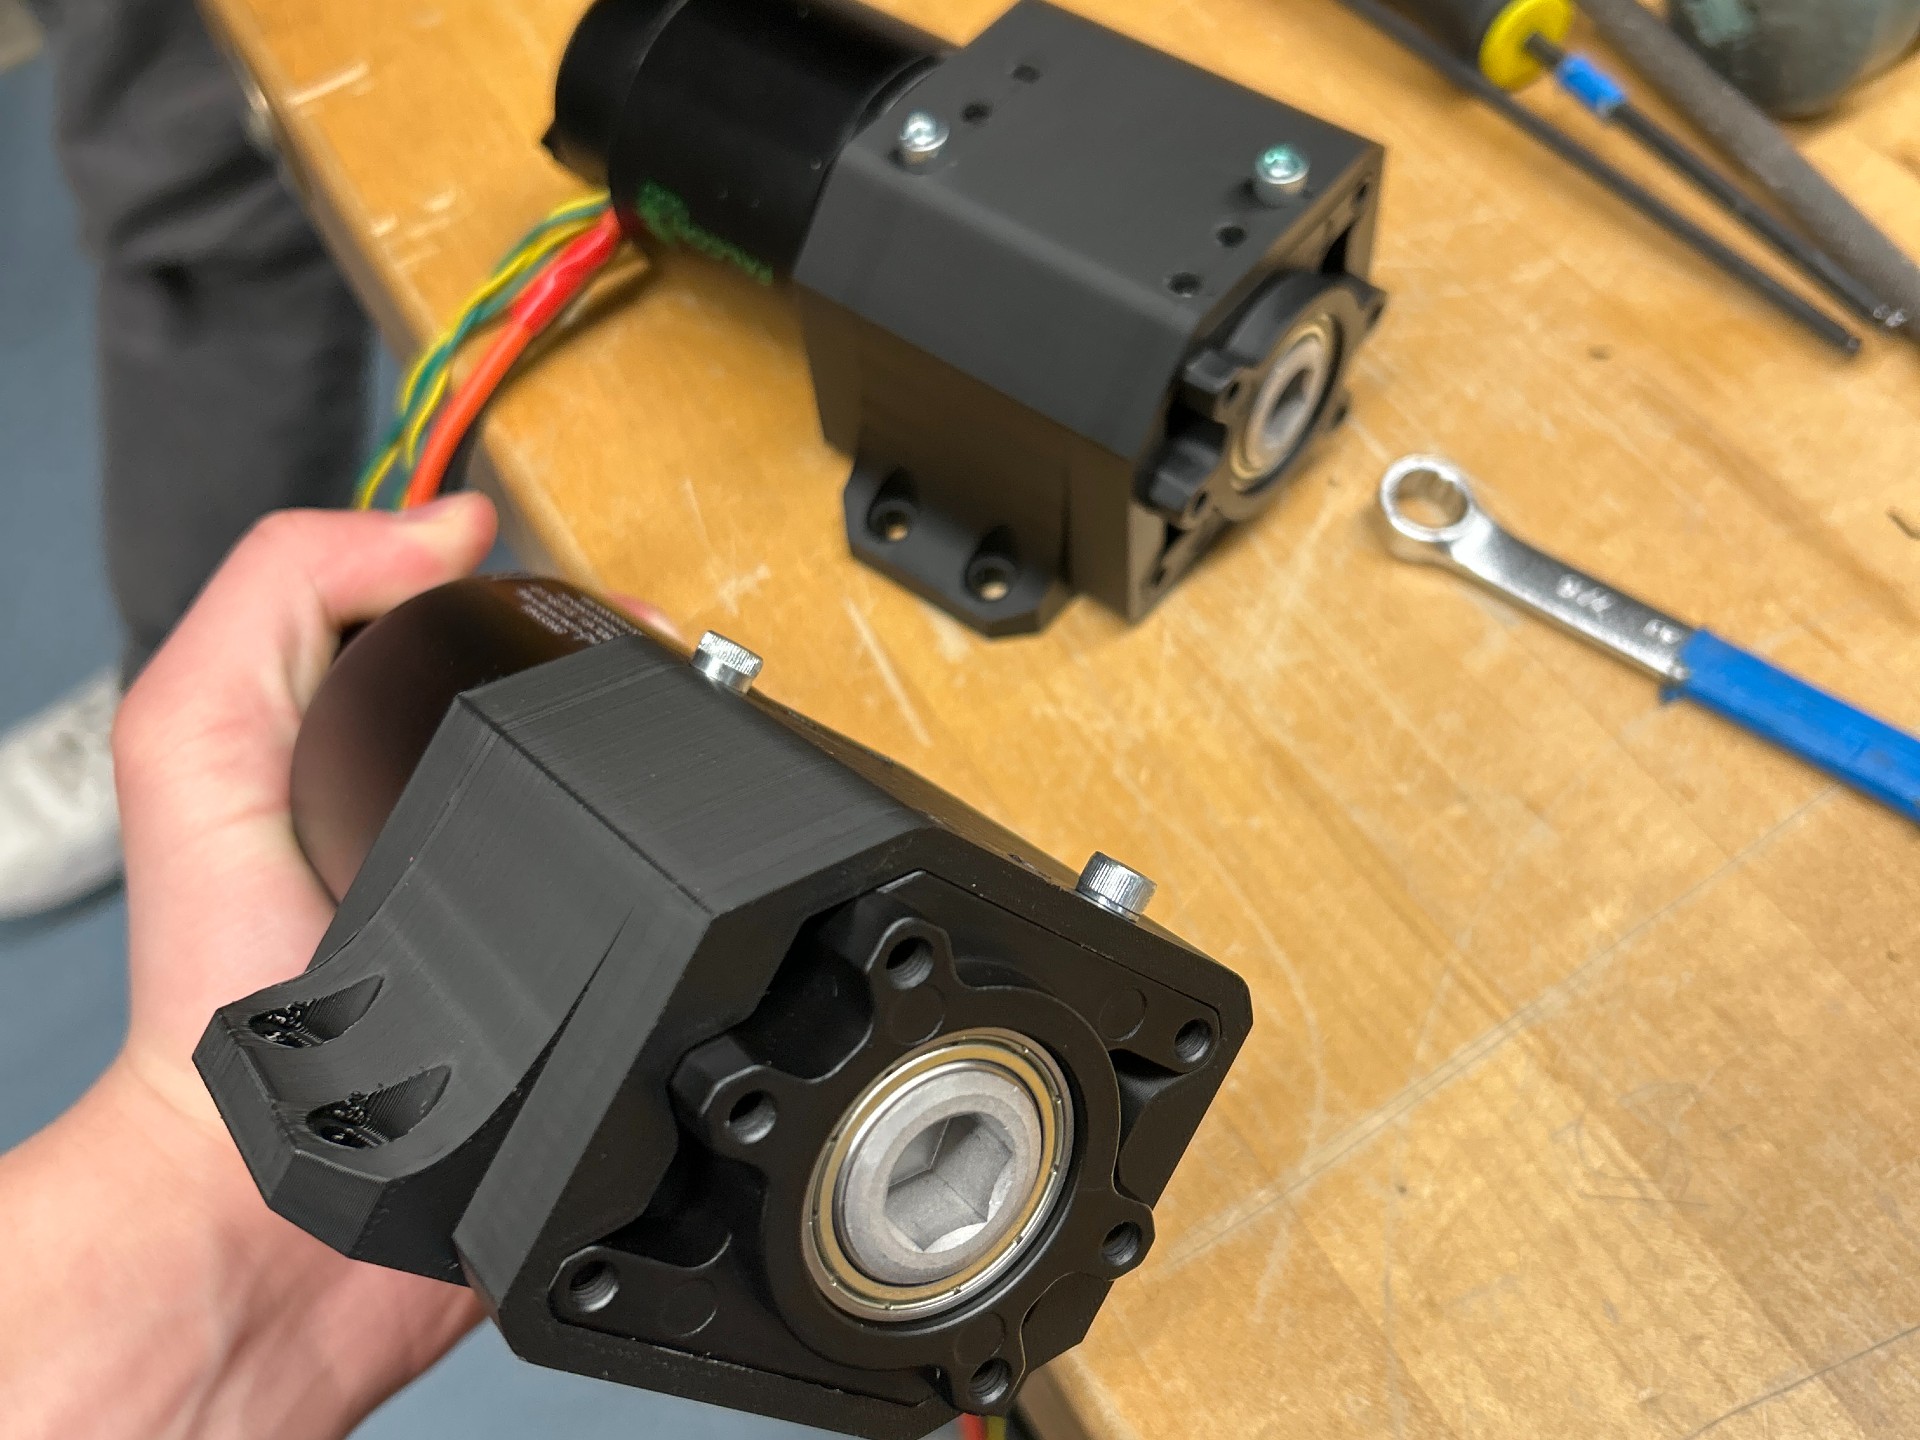
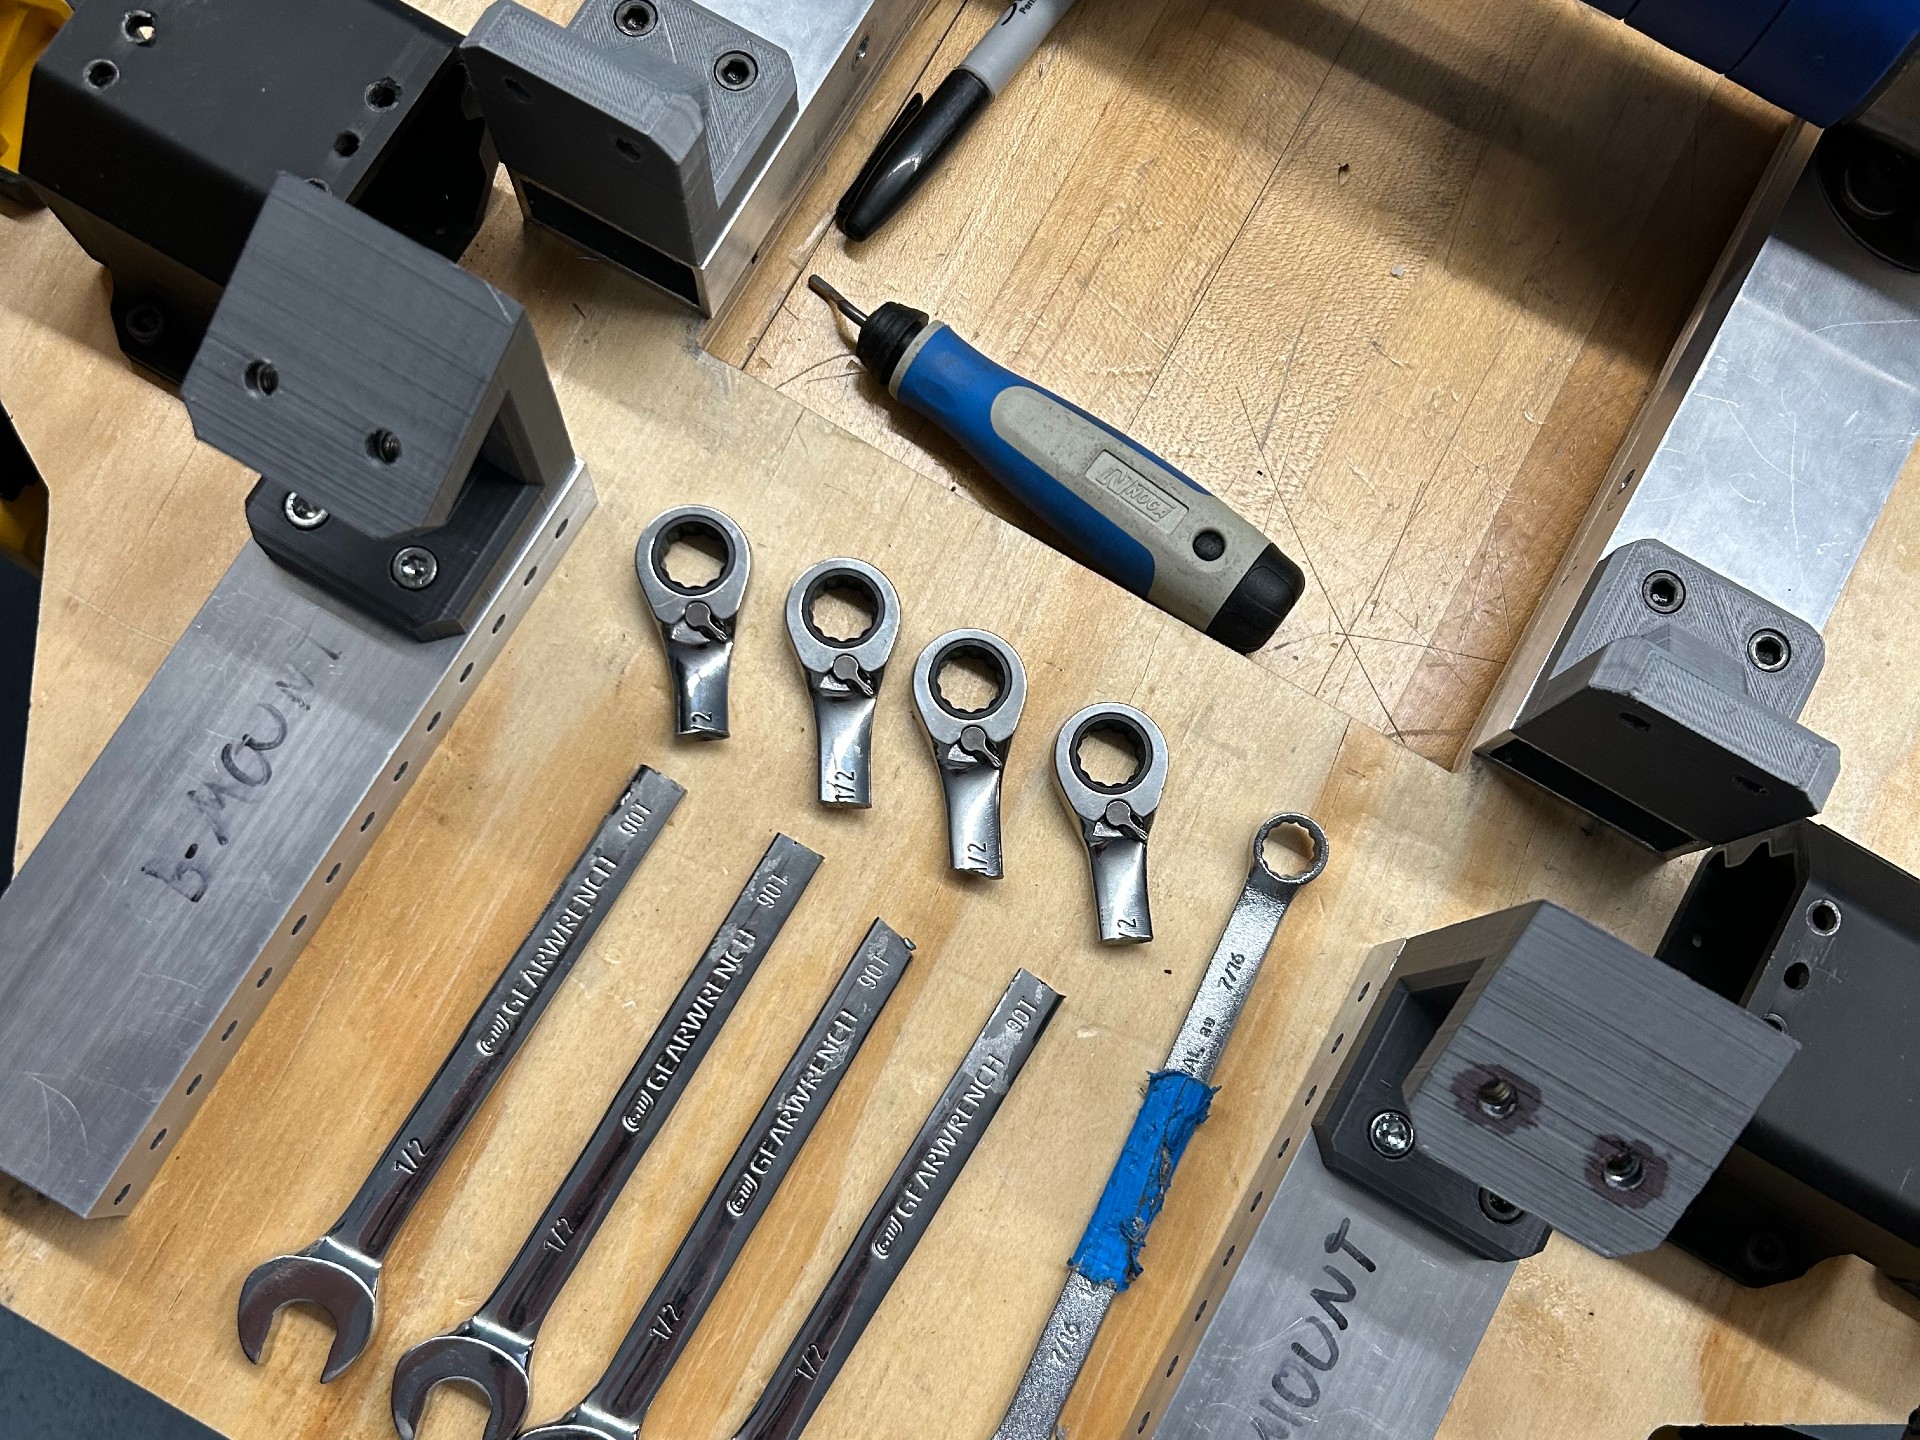
More pictures from this season: